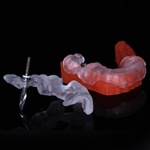
Here is my first case with my new Comfort Plus!!! Patient had bridges from 2-6 with a pier abutment on 4 and a 3 unit from 11-13 she wanted replaced. We knew we would be removing the bridges and I was worried about rocking so I planned the case in Classic Guide so that we could get a Palate for stability. No bone on #3 and the patient did not want a lift, so we opted for a 3 unit bridge 2-4 and crowns on the rest. Implants planned for 5 and 12.

If I have patients in temporaries for a long time I always go for Bio Temps, so I removed the bridges and decay and rough prepped the teeth and took a PVS impression as normal. I tried the guide it and checked for stability…all good.

Smooth case, when dealing with this ridges its important to feel around with a ball ended probe just to confirm that you are still in bone.

Undersized the osteotomy to a 2.8mm drill on #5 and placed a 3.7 implant. #12 was super thin so we just drilled with the 2.3 and placed a 3.2 implant.

I have to say I like the large FOV just to sit back and look at the implants as a whole. Implants placed where the bone was. Angulation looks good, but I will most likely go with custom abuts on both to get a nice emergence profile.

Temporary temps. Will post pictures of the Biotemps when I get them. El cheapo healing caps to keep it low profile so when I get the Bio Temps back I don’t have to adjust.

Completed case. I am not in love with #5 and #12. I ended up using titanium stock abutments and Emax LT crowns thinking the low translucency would block the titanium. Since there is no Ti Base for a Legacy 3 3.2mm implant I did not opt for a zirconia, although I could have use the stock Implant Direct zirconia abutment. Hard to see in the mouth with her smile line. #7-10 were dry seated on this picture.


