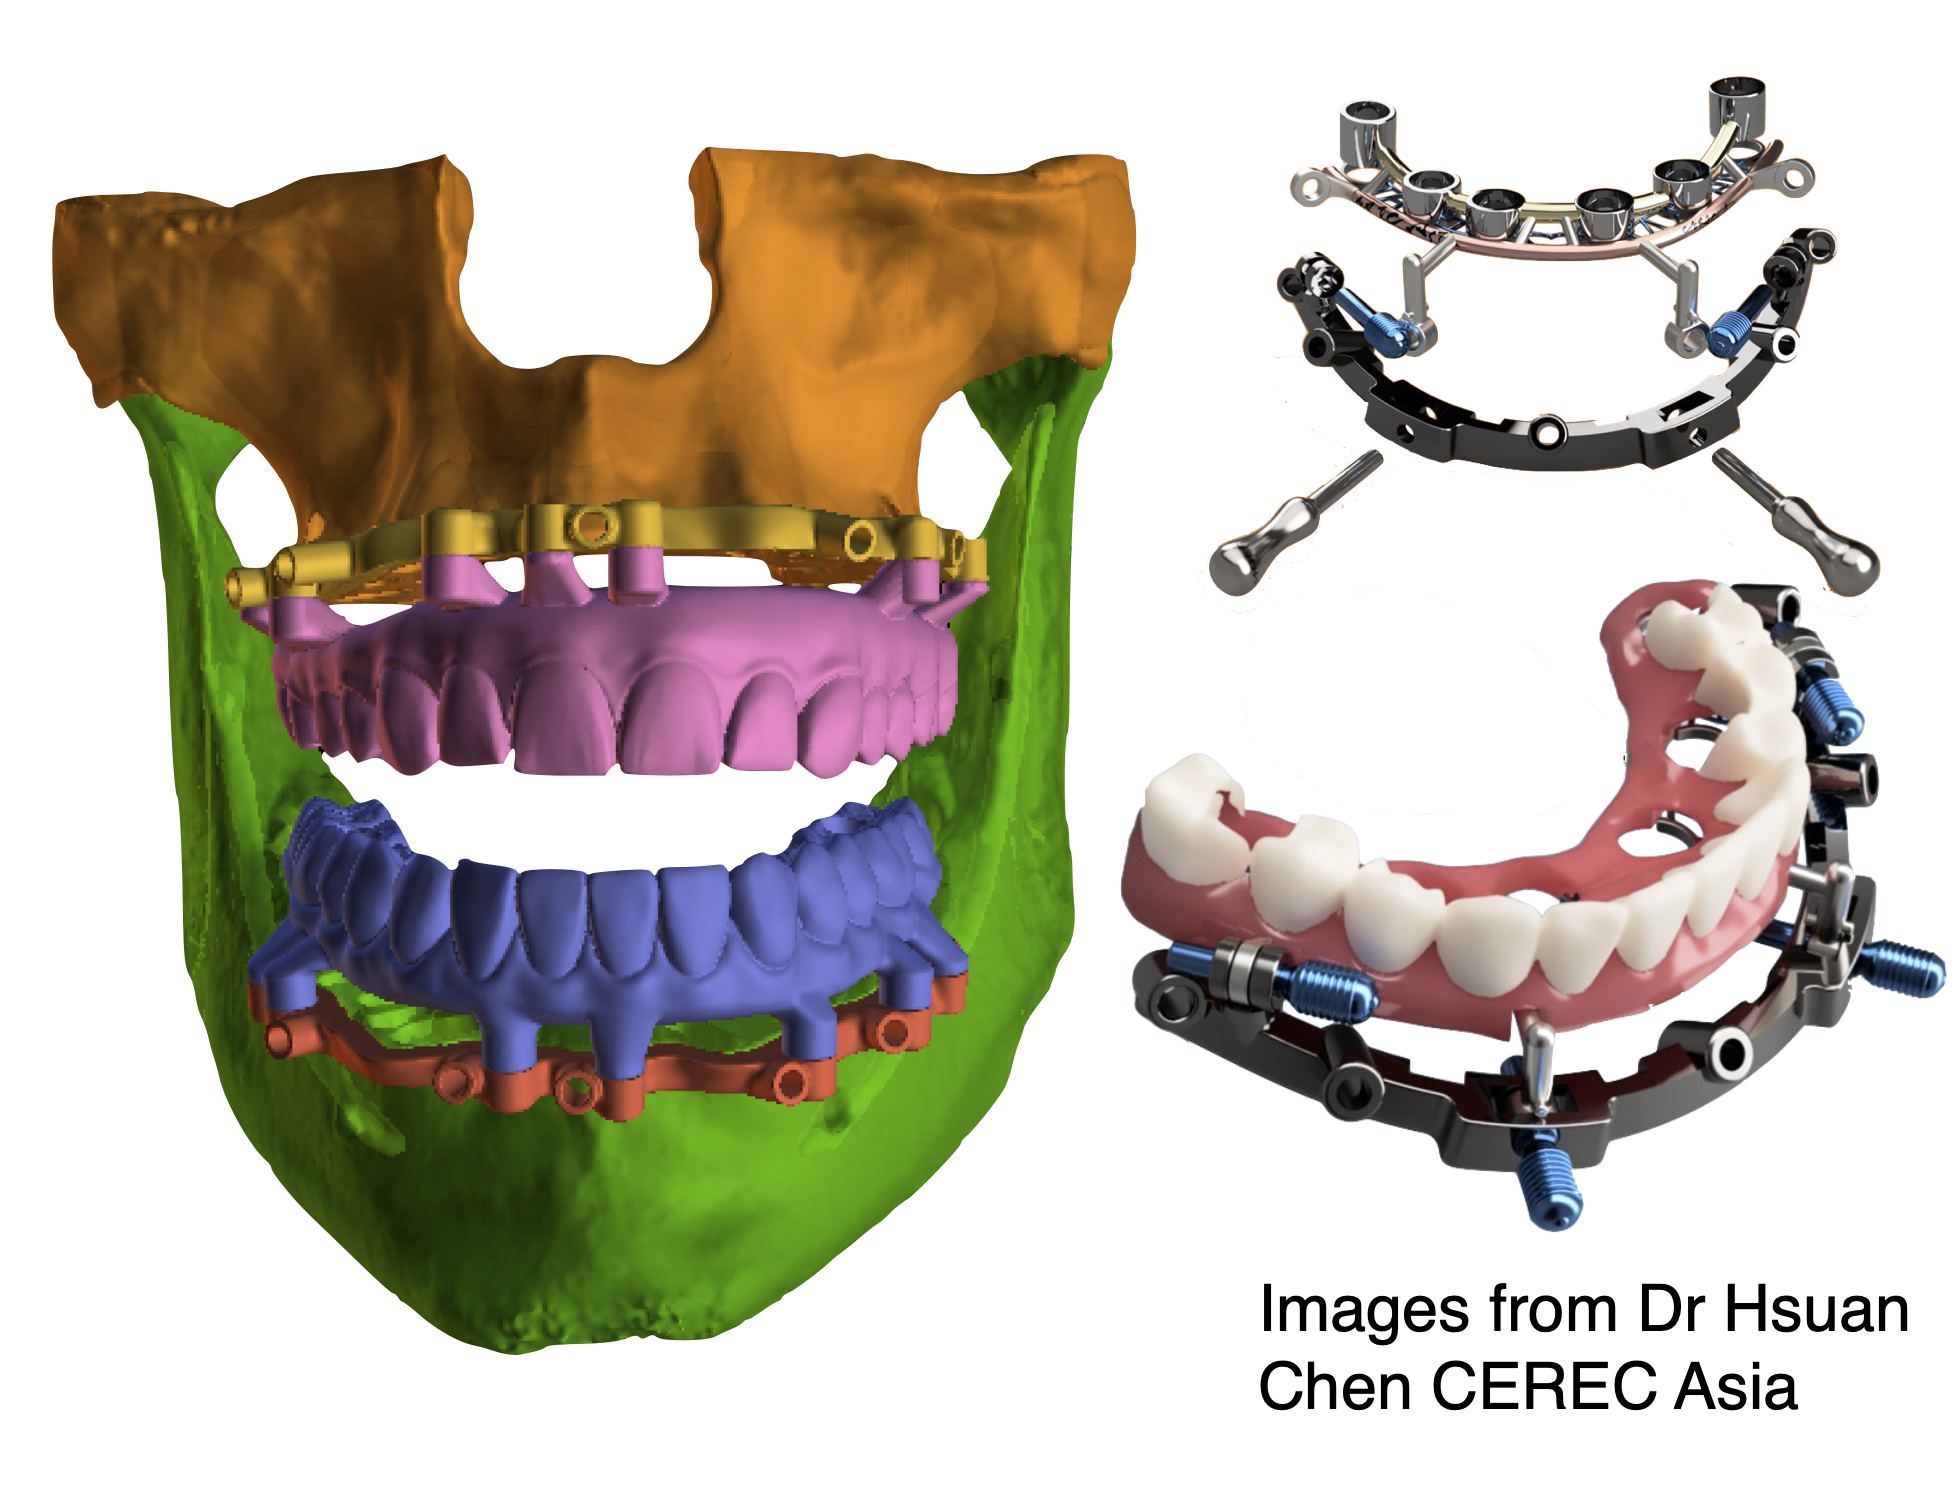
So this is my first stackable case, so go easy, I’m fragile :}. First a big thank you to Rajan Sheth, Cory Glen and Ben Callum for their help on the guide and Blue Sky Plan case. I had a little input but can’t take all the credit. I’ve done all on X cases free hand, and have done them guided on a soft tissue supported guide with pins but never did a stackable case, so this was a good one to start with. I am by no means an expert nor do I think I am knowledgeable enough to teach this, just sharing my first case. If you are not familiar, a stackable case consists of a titanium or printed frame that rests on the bone of the maxilla and mandible and serves as a bone reduction guide as well as an anchor for the surgical guide and hybrid, which is picked up with titanium cylinders. Dr Hsuan Chen posted a case on CEREC Asia on Facebook and the images on the right are from that case and are a good illustration as to what a stackable guide is all about.
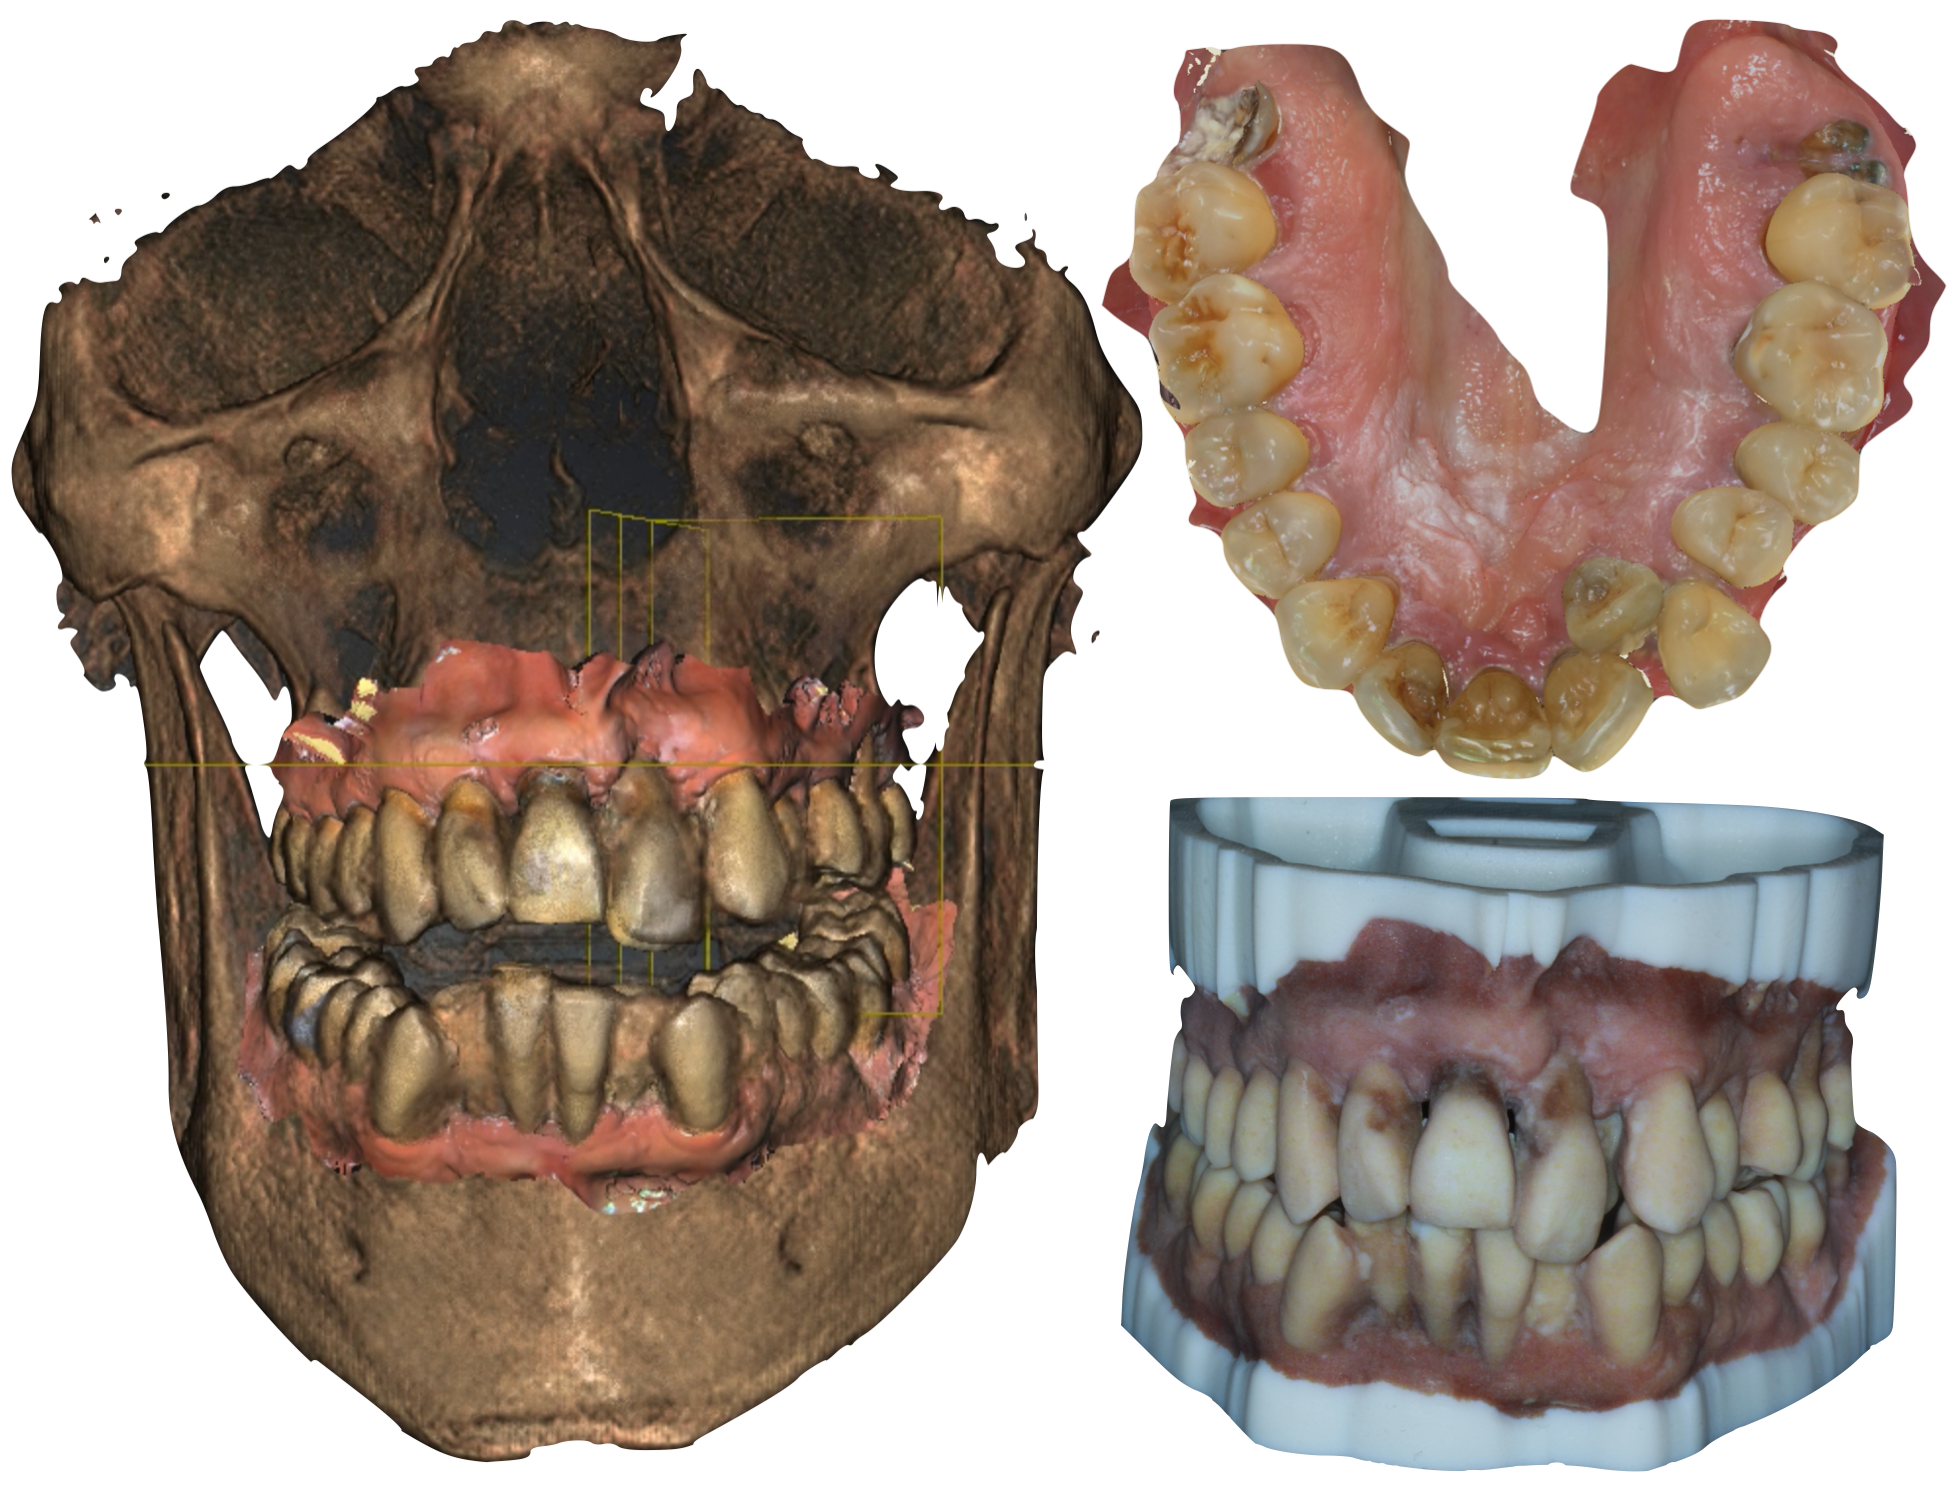
As with all guided case you start with a CBCT and scans of the patient’s teeth and gingiva. Just for fun and my nerdy AR guided surgery stuff I am working on, I had models printed in color by the Stratasys J700 Polyjet printer. Rather than a resin vat with a single color resin, the Polyjet acts like an inkjet printer and shoots out various colored resins and cures it, so you get some amazing detail and color. Look for this in the future with stronger resins and 3D printing of crowns, dentures and hybrids pre stained and ready for glaze!
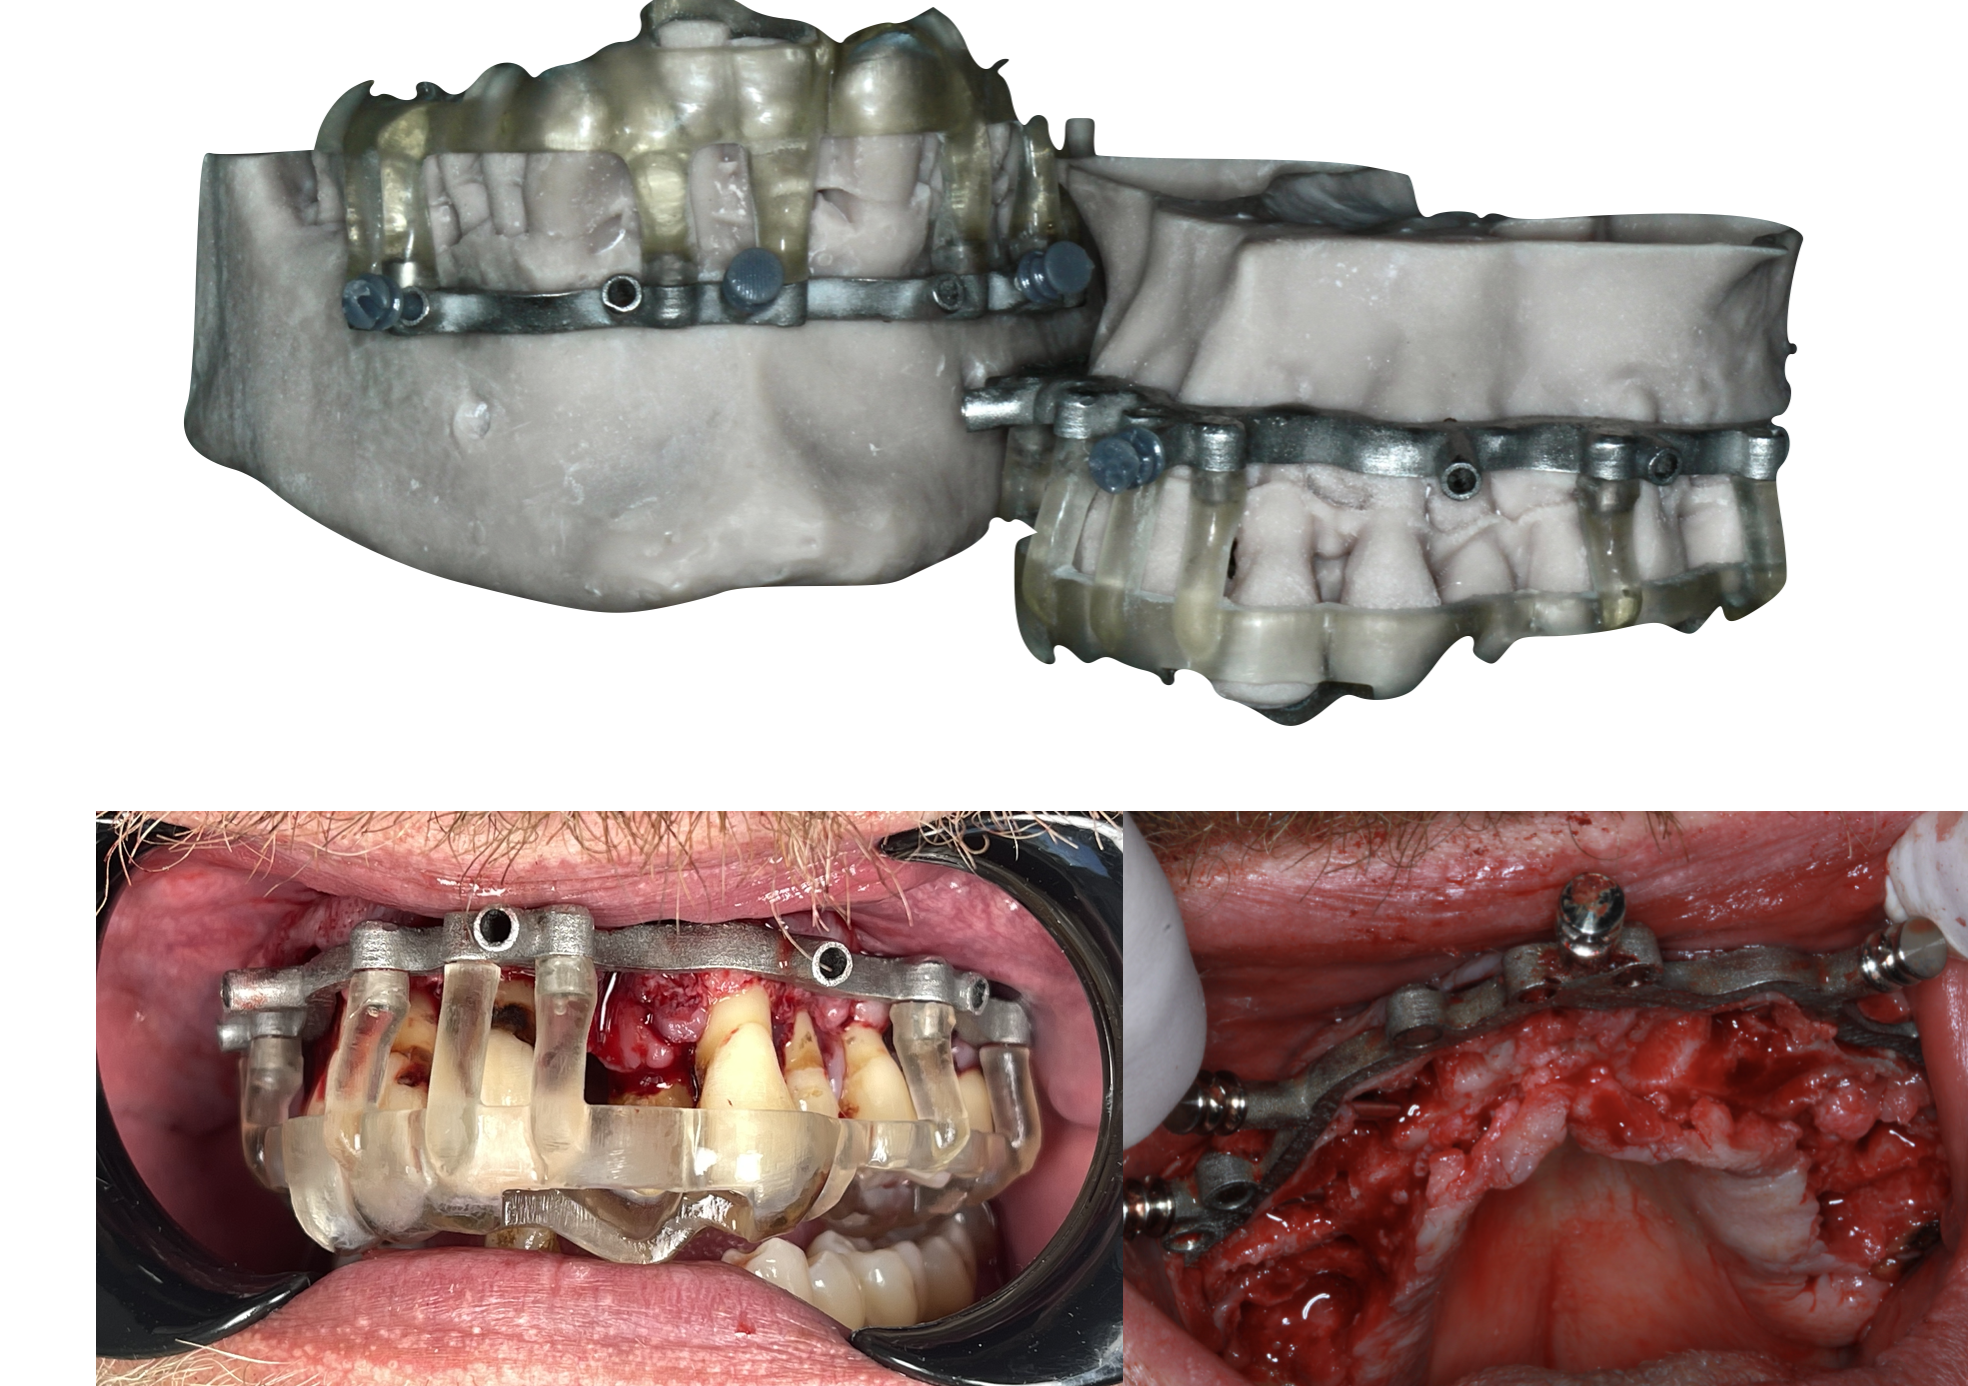
As mentioned before, everything rests on the bone reduction frame. This patient had terminal teeth either from decay or perio. We actually had to splint a few of his really mobile teeth to take an impression for a backup denture as I couldn’t get his palate in the scan. A 3D printed index which was printed in clear resin on the Sprintray Pro snaps into the frame with magnets. This positions the frame so you can place the insertion pins. The teeth were removed and the bone reduced.
If you know me, you know I’m into VR and AR. I animated the procedure and placed it on the patient’s face using augmented reality. This is just a simulation but it is the basis of my augmented reality guided surgery system, X-Ray Vision by my company ImmersiveMed.
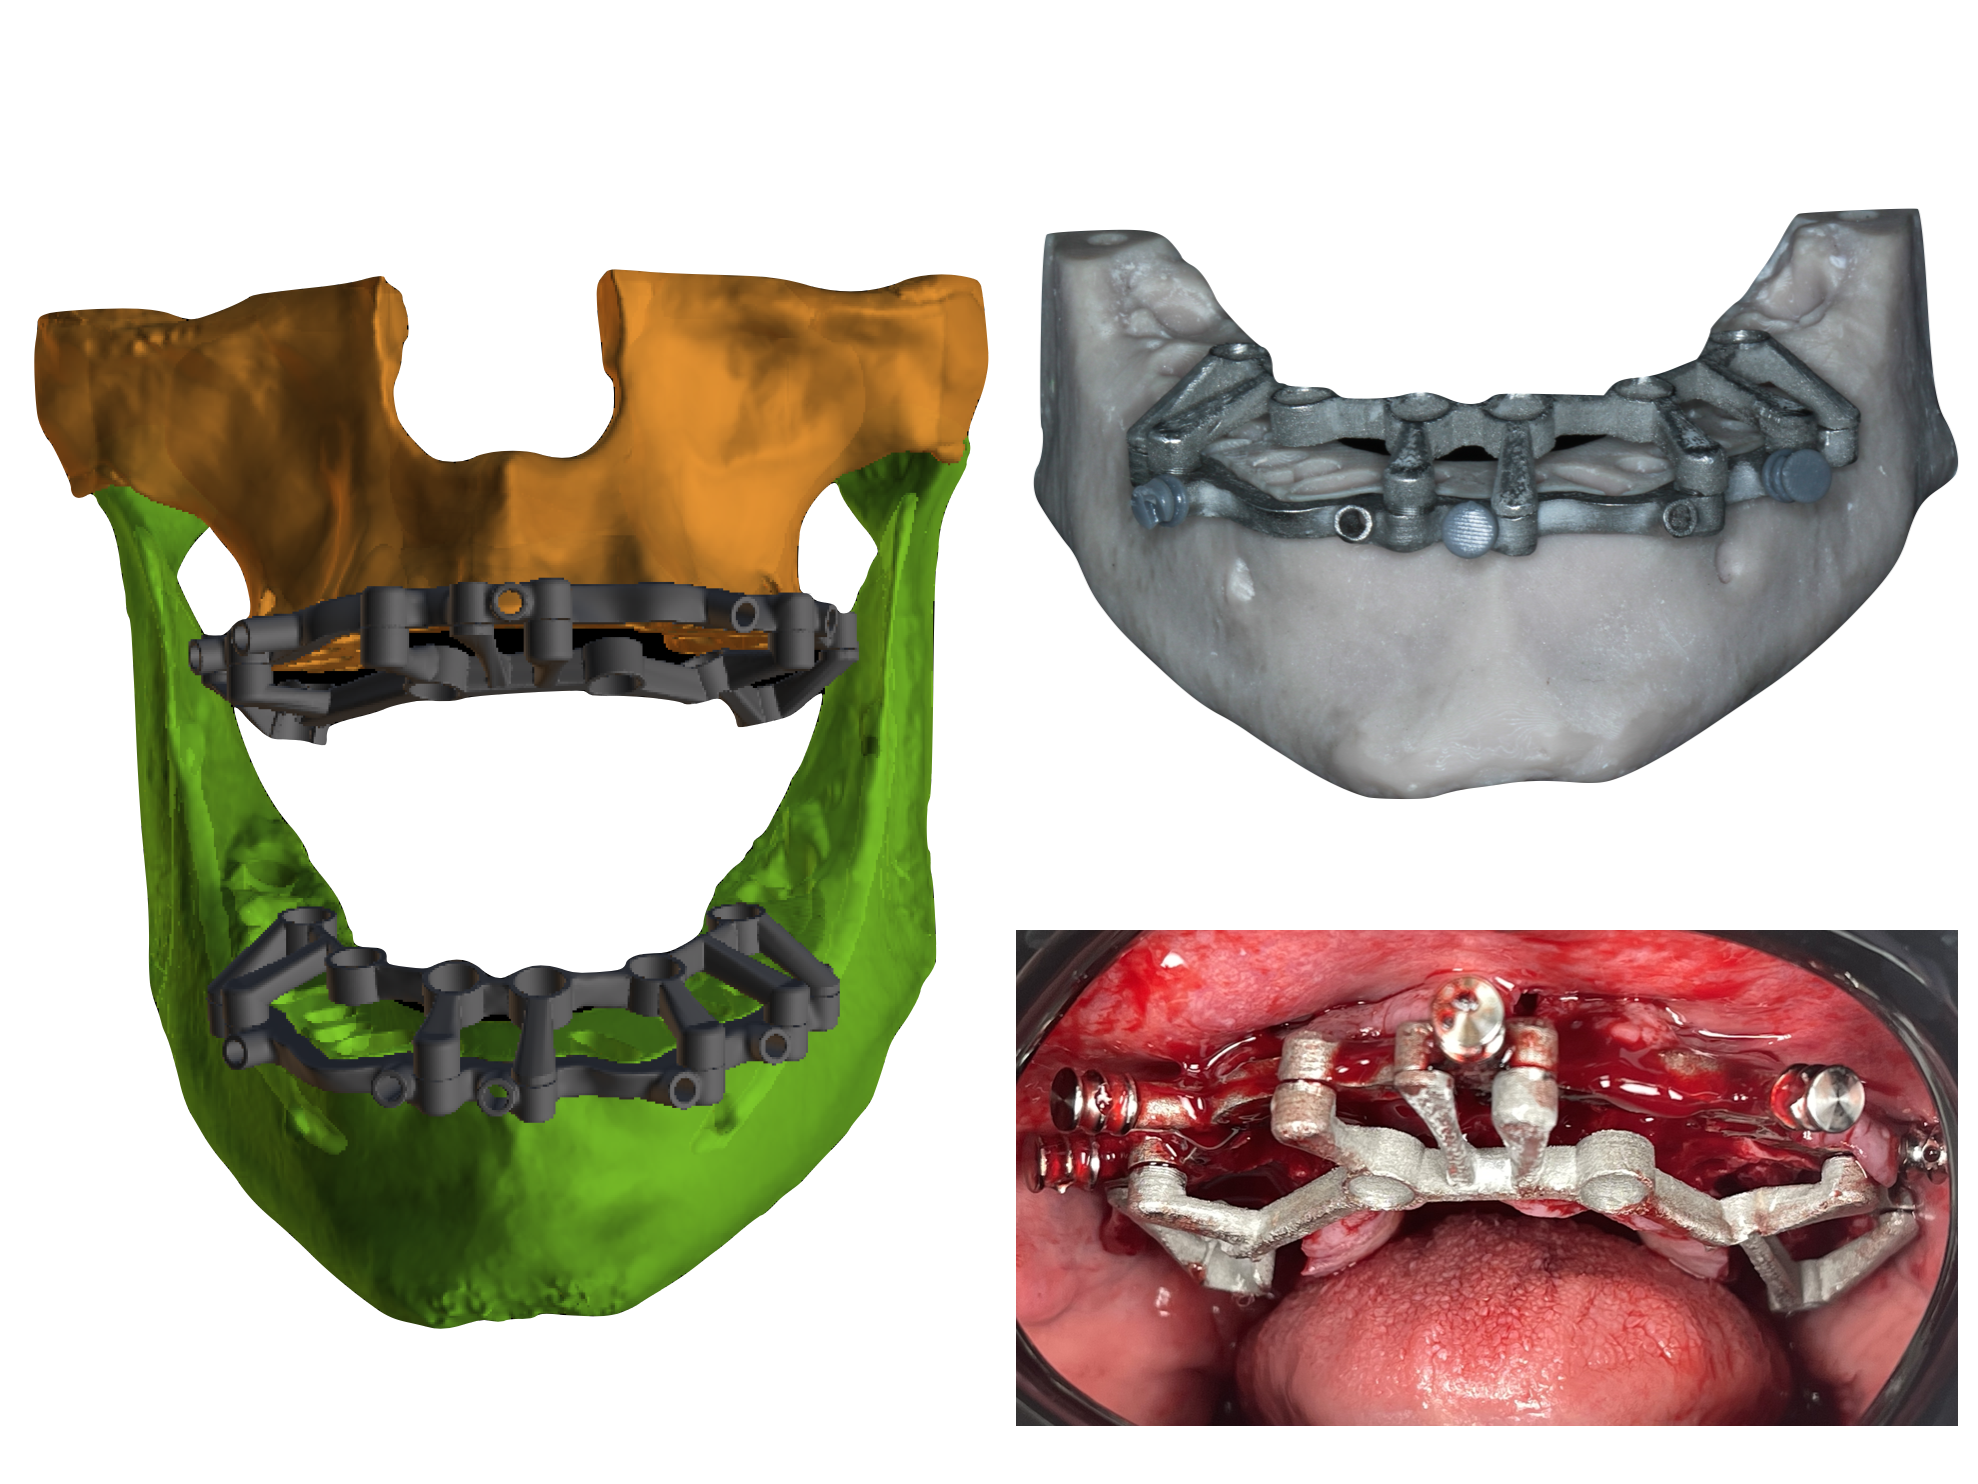
So now that you have the frame in place and the bone reduction done, the surgical guide is attached to the frame via magnets. Big thank you to Ben Kellum and Cory Glen for making and designing this case.
Here is the Augmented Reality animation of how this works. I used the Blue Sky Bio keyless system and did my best to undersize the osteotomies. One issue I ran into was his bone was super soft! The implants planned were mostly 5 by 13mm implants and I stopped at a 3.4mm drill and still got some deviation when inserting the implants into soft bone. The implants were wider than the guide tubes so I had to insert them free hand.

After placing the implants and the multi units, temporary titanium cylinders were placed The goal obviously was to do this at the time of surgery with the frame on. Unfortunately my patient had back surgery and was in a lot of pain during the procedure and couldn’t take it any longer. So we brought him back and just did a traditional pick up with temp cylinders and rubber dam material so that the resins didn’t lock onto the multi units. Very little bite adjustment.
Here is another augmented reality animation showing the process of picking up the cylinders and inserting the hybrid into the frame.
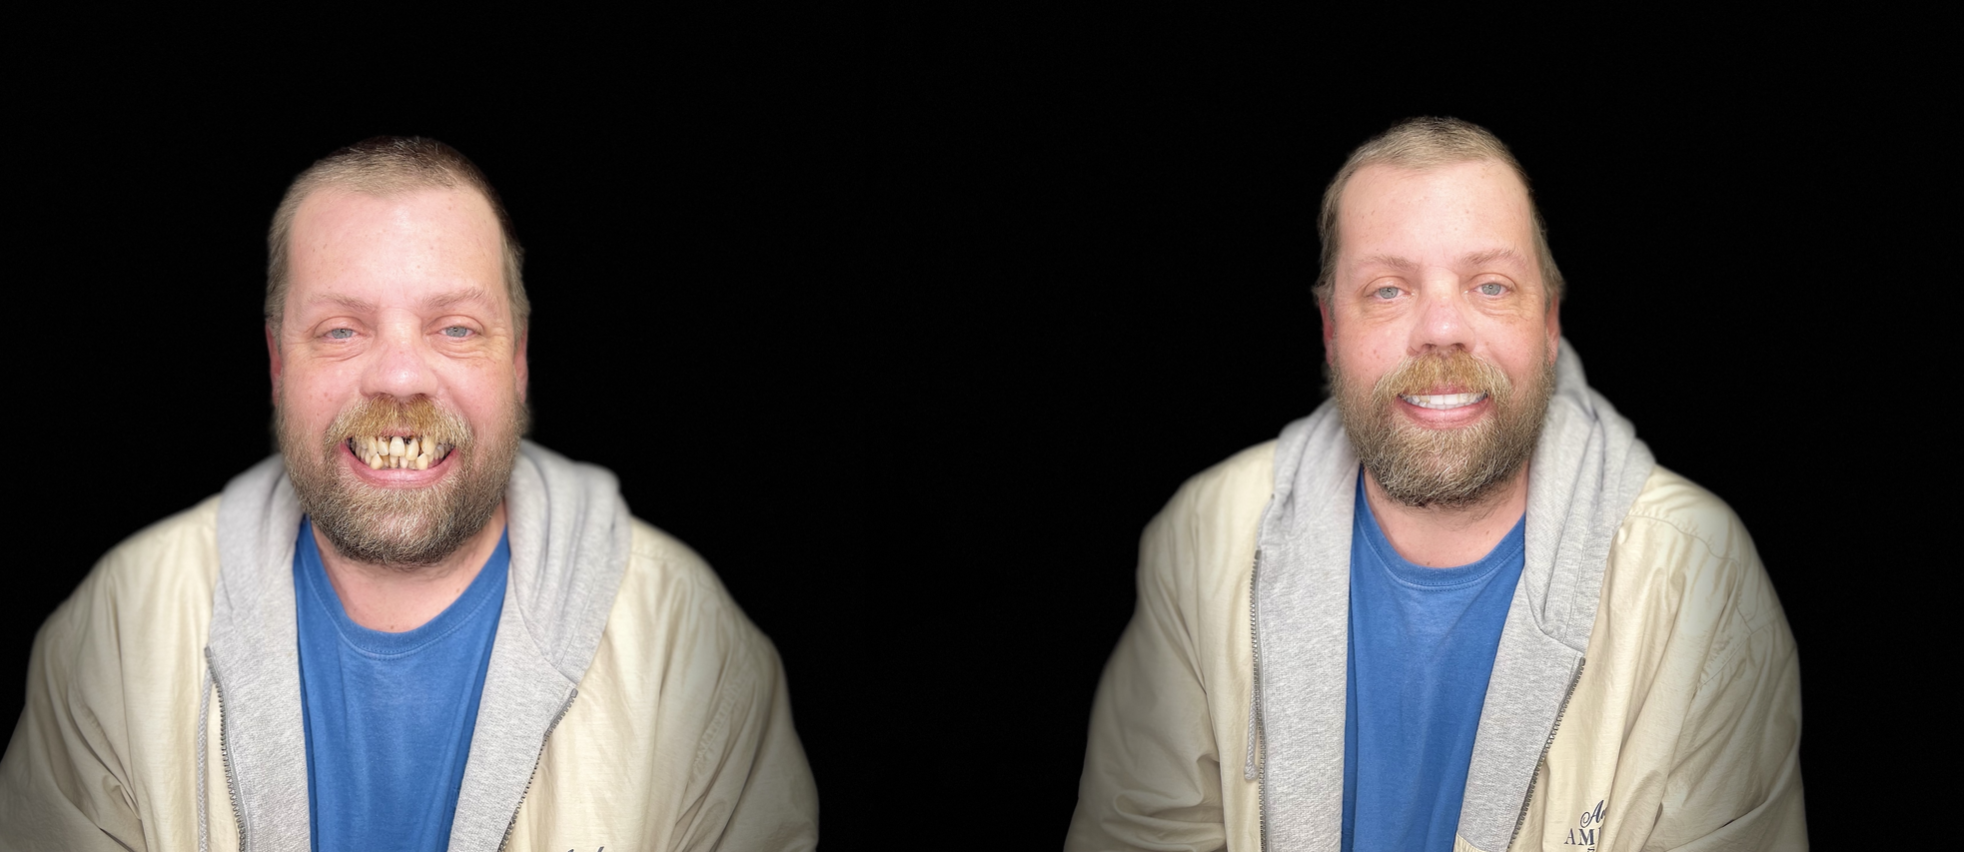
I think the before and after shows an improvement. We placed 6 implants on the top and 6 on the bottom. The implants on 2 and 15 were spinners so we did not engage them and cut the hybrid in the molar area so it was just premolars.
In this augmented reality animation I think you can see the power in showing the patient their completed smile before treatment starts. This was an ExoCAD hybrid design. Again a big thanks to Ben Kallum, Cory Glen and Rajan Sheth.

