Here is “somewhat” of an immediate load case. Patient has a number of non restorable teeth including one Implant on #24. Removed the rest of the teeth and removed the implant crown and placed a healing abutment. Later placed a GPS attachment after a few months of healing for an “All On One” Overdenture.

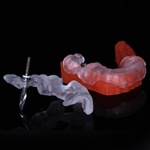
Got the patient into a full lower and made two duplicates. One was attached to the SICAT bite plate and the other will be used as an occlusal rim.

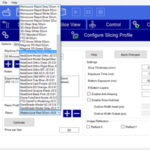
The denture was scanned with the Omnicam using version CEREC 4.3. Just a little margin enough to get some sort of proposal so we could output it.

As the radiographic guide was a copy of the denture this match up the same way we match up partially edentulous .SSI files with teeth in the 3D Pan.

You can really see what a difference it makes in the plan. Its hard to see but my left stabilization pin is off the flange.

Patient is ready to roll. Stabilized the guide with 3 pins to hold it down. Nice stable ridge.

As the patient had one RePlant implant I wanted to keep everything the same. That being said, with the angulation of #24 we may end up using it just for support. I also like to keep the length and width constant with my implants when doing multiples just to not worry about over or under drilling. All implants were 4.2 by 13mm.

Tried to make a verification jig in the mouth. Lets just say its easier on a model, LOL. Open tray impression just using long screws and the RePlant mounts. Got a good model that can be used as the final model after healing.

Took about a week to modify the patient denture on the model. Tissue really grew over. Used the DEKA laser to uncover really quickly.

Pretty easy delivery. Had to use a lot more Teflon tape. Patient will be back in 3 months to start the process for a lower hybrid.

Ok, finally done! As we did an intra oral luted jig, we were able to bypass taking another final impression. We used the orginal model to get the metal frame from Custom Direct. This is a Y-bar frame, that is a wrap around. That is acrylic or composite can be added to the “saddle” areas above the edentulous space.

Remember the Radiographic guide? Its back! We affixed it to two implants to provide rigitity and this gave us our bite, vertical, and also a matrix for the frame design. Wax try in after the frame try in. Remember the Sheffield Test, the wax up or just the frame should be attached with only one screw and not rock.

Isn’t Jack great!! Level 3 is my workhorse lab and theres nothing he cant do! He has InLab and is now doing Hybrids! He is one of those Von Grow/Damaged Good guys. Which I love as I want my stuff to look real, not some slapped on stain and glaze on straight biogeneric anatomy. Here Jack used Ivoclar Phonares teeth over good old fashioned lucitone 199! Why not a Zirocnia Hybrid? Good question, I like the fact that these are so repairable and that Zirocnia is just so opaque.

Ok its go time. Note the convex undersurface of the hybrid. Those little screw drivers can be too short for hybrids but I find the 1.25 insertion tool is a little longer. You made need longer screws than the stardard overdenture screws in deeper areas.

Looks great! Torqued down to 20 after sequential hand tightening. I usually just go to the contraleteral side and eventually tighten each one after letting each screw relax.

Lots of Teflon tape and Anaxgum compoiste in the access. Such a nice result! You can see the differnce a lab makes. The upper is also a titanium frame hybrid with lucitone 199, but you can see how festooned Jack’s is.


