
Patient was working out of state when his implant just fell out! Looks like an old press fit type. The local doc made him a flipper and he went back to finish his job about 3 months ago.

Really loving smile design for generating my SSI files. Just one more dimension to make sure that we can deliver to the patient what was promised.

Again, you know how I roll. Optiguide, used a drill extender to get past the adjacent teeth. Why not CEREC Guide? Just really busy that day he initially came in.

Implant placed, again used the extender to get around the front teeth. Note the slight lingual placement.

Final, I know on the X-ray it looks close to the lateral but I have other films showing we have at least 1mm if not 1.5. Just the angulation. Pt had a flipper so we did not immediately temporize.
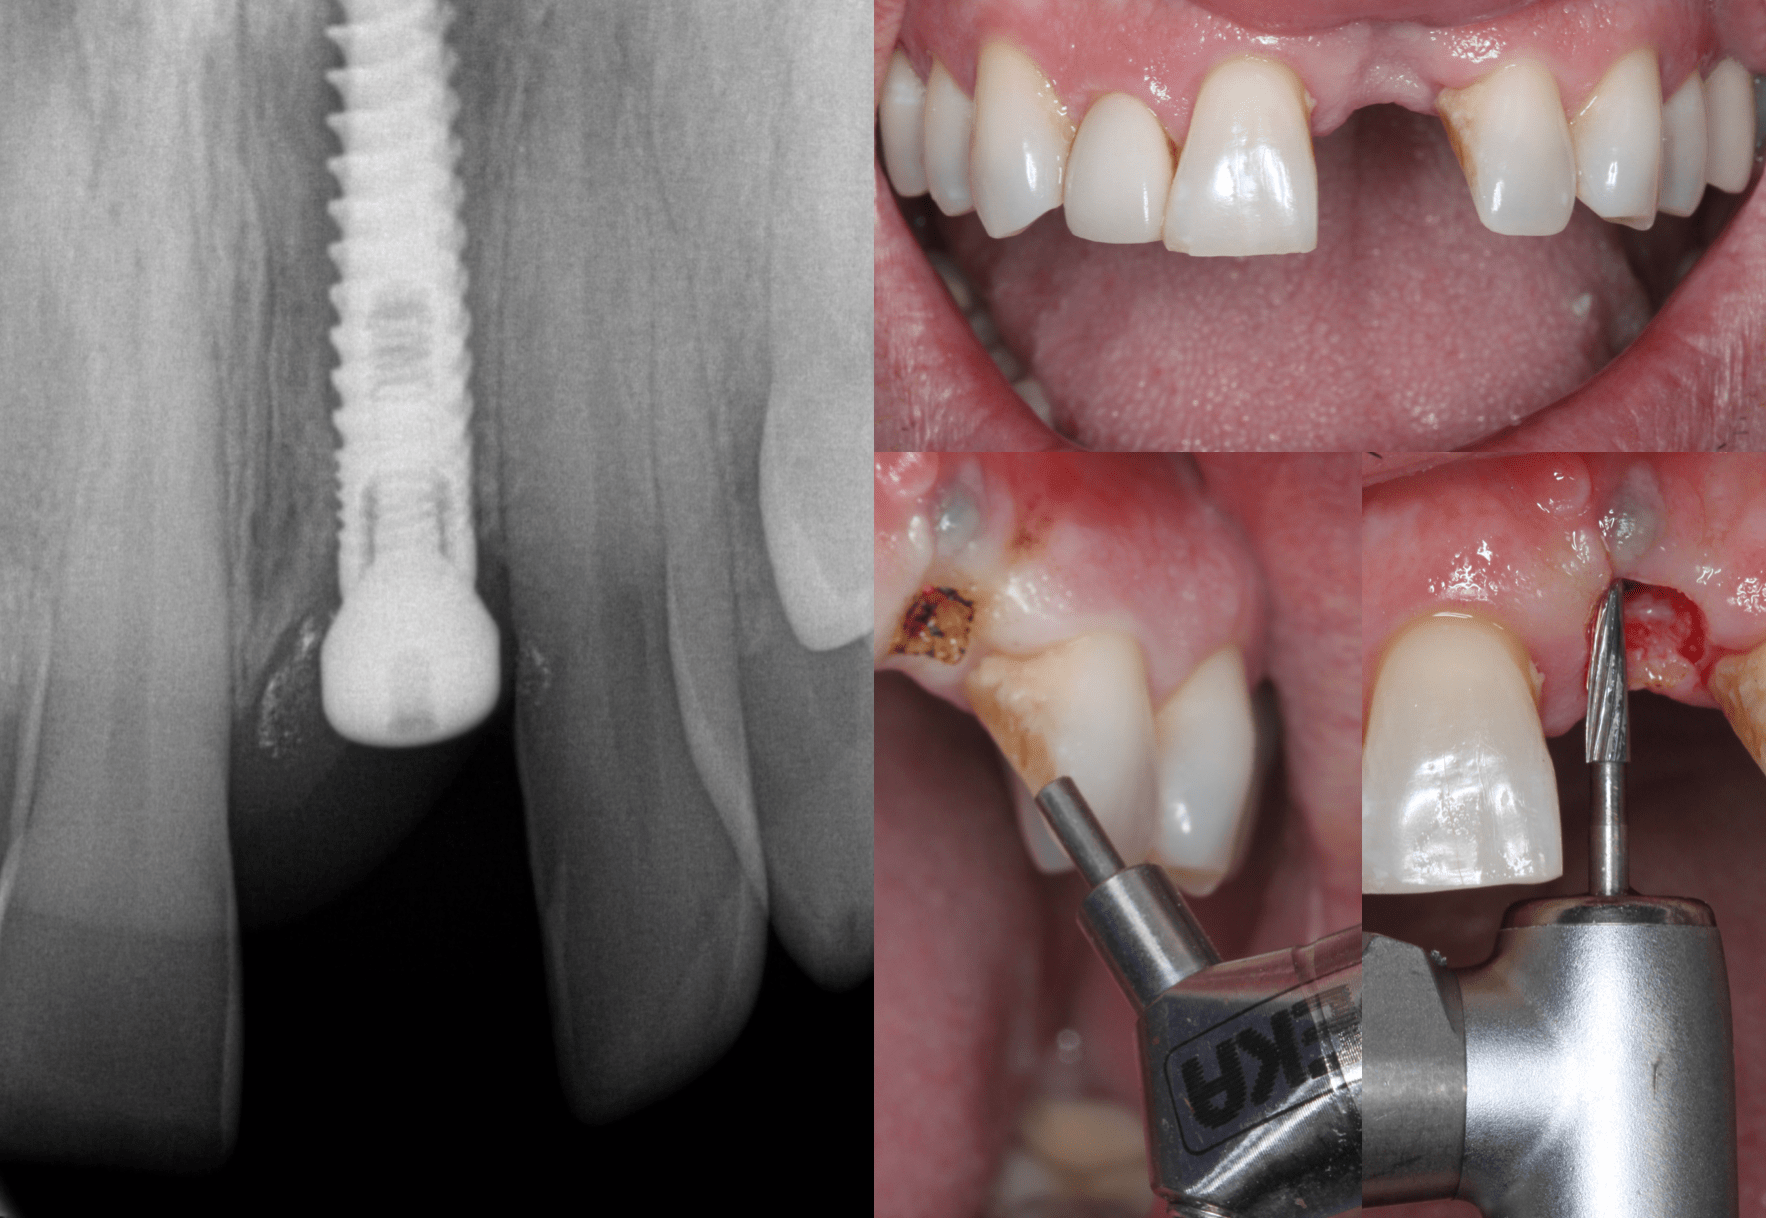
Crap!!!! Patient felt pain a few weeks later, we took a PA, tough to see but note the radio lucent areas on either side of the implant. Removed with fingers. Grafted, let sit for 4 months and placed another. Used a combination of laser and a carbide chamfer bur to uncover and shape the tissue, to accept a Telio CAD temp.
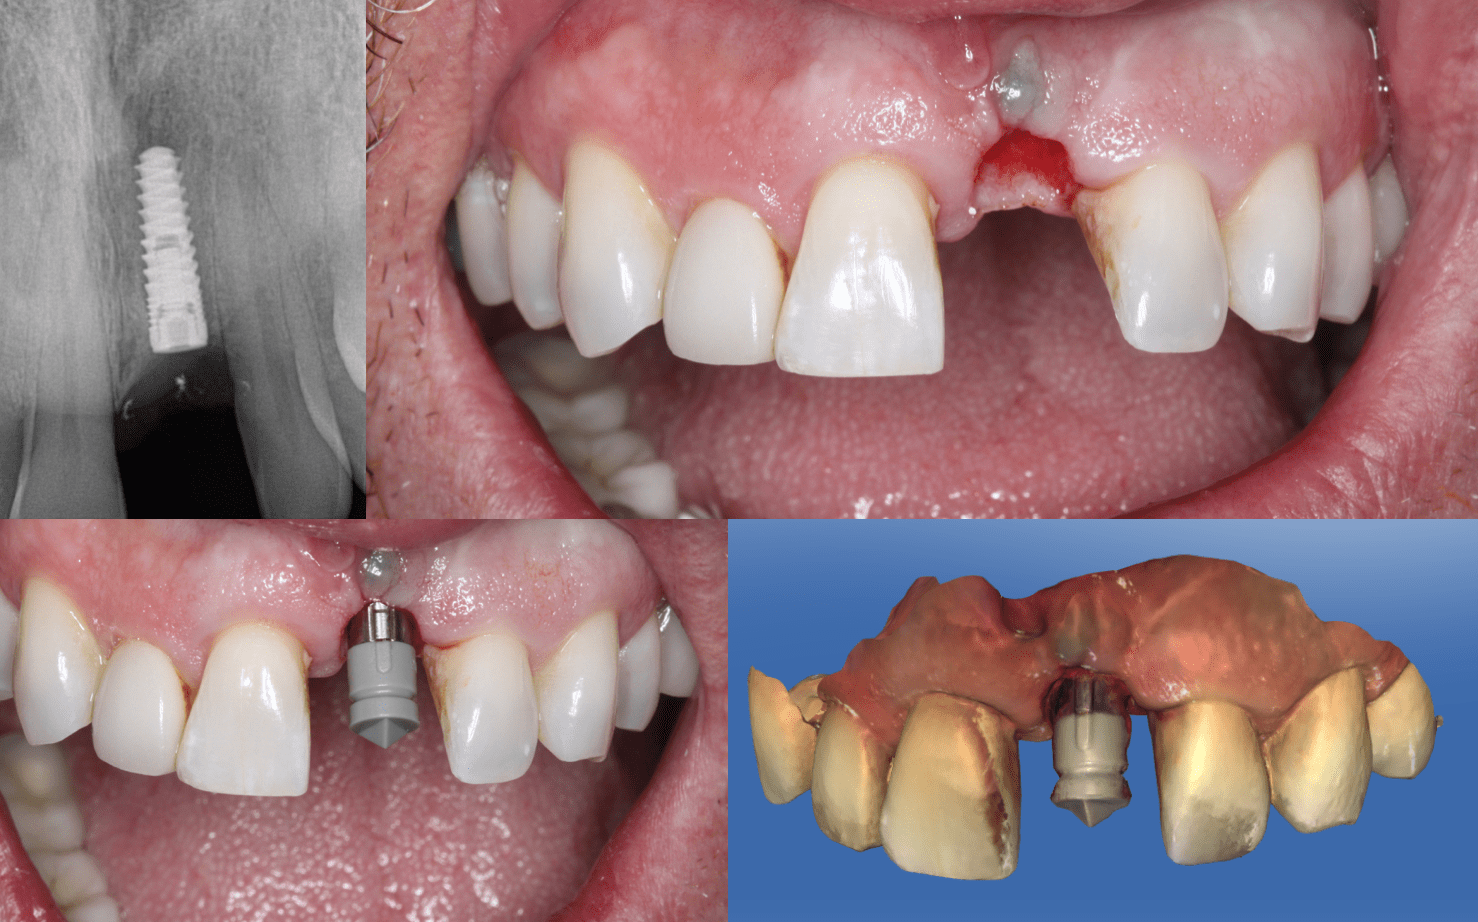
Here is the PA of the second implant. Whew! Finally took. Don’t know about your implant failures but for some reason, second time is always the charm! Scanned with a TSV 3.5mm Scan Post.
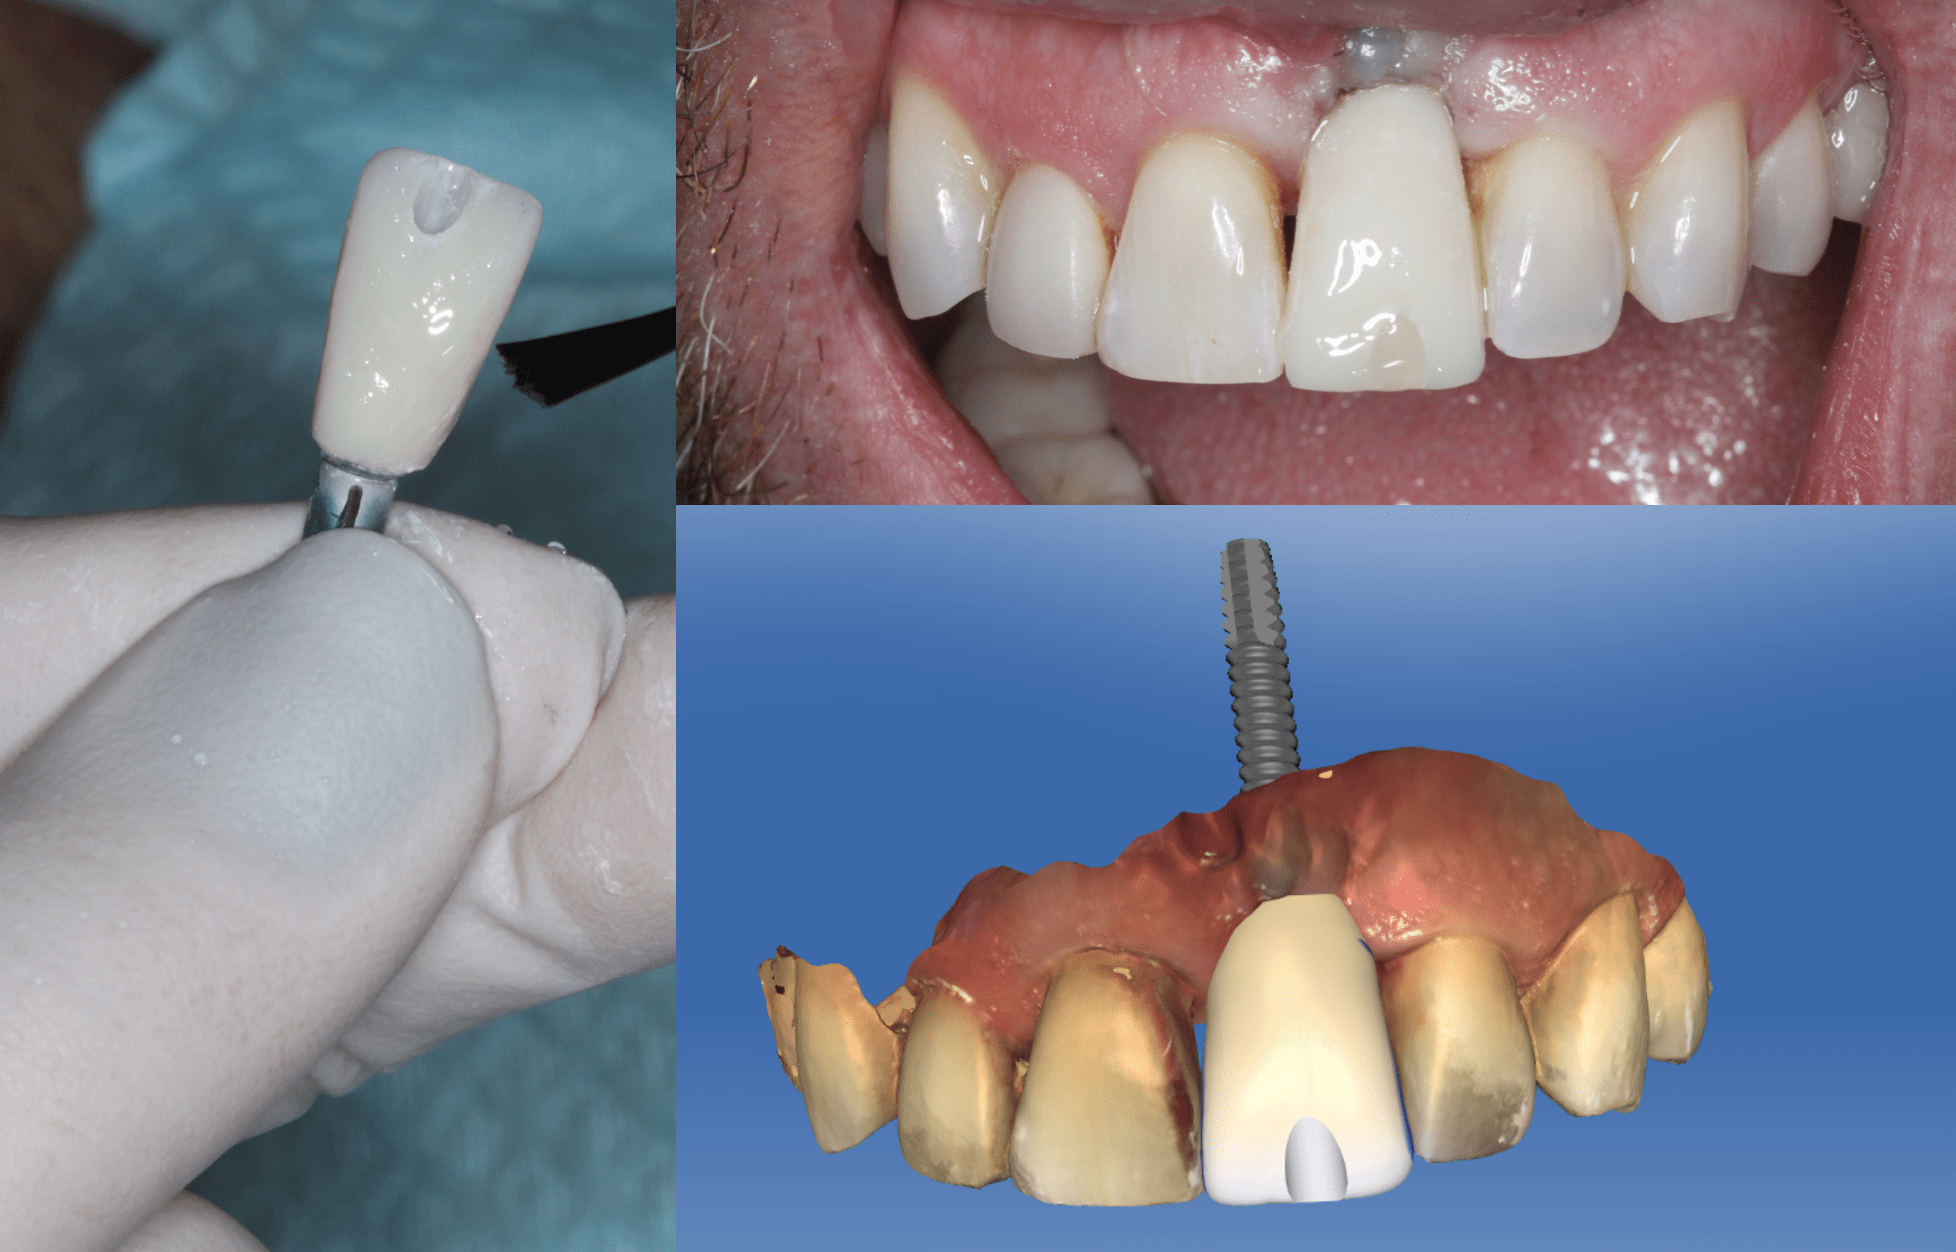
Telio CAD temp. I love the acrylic glaze, make sure you are not using the composite glaze. Yes I know the CEJ is quite a bit more Apical. Between losing two implants and contouring the tissue we didn’t have the height we wanted. Good thing he has a low lip line.
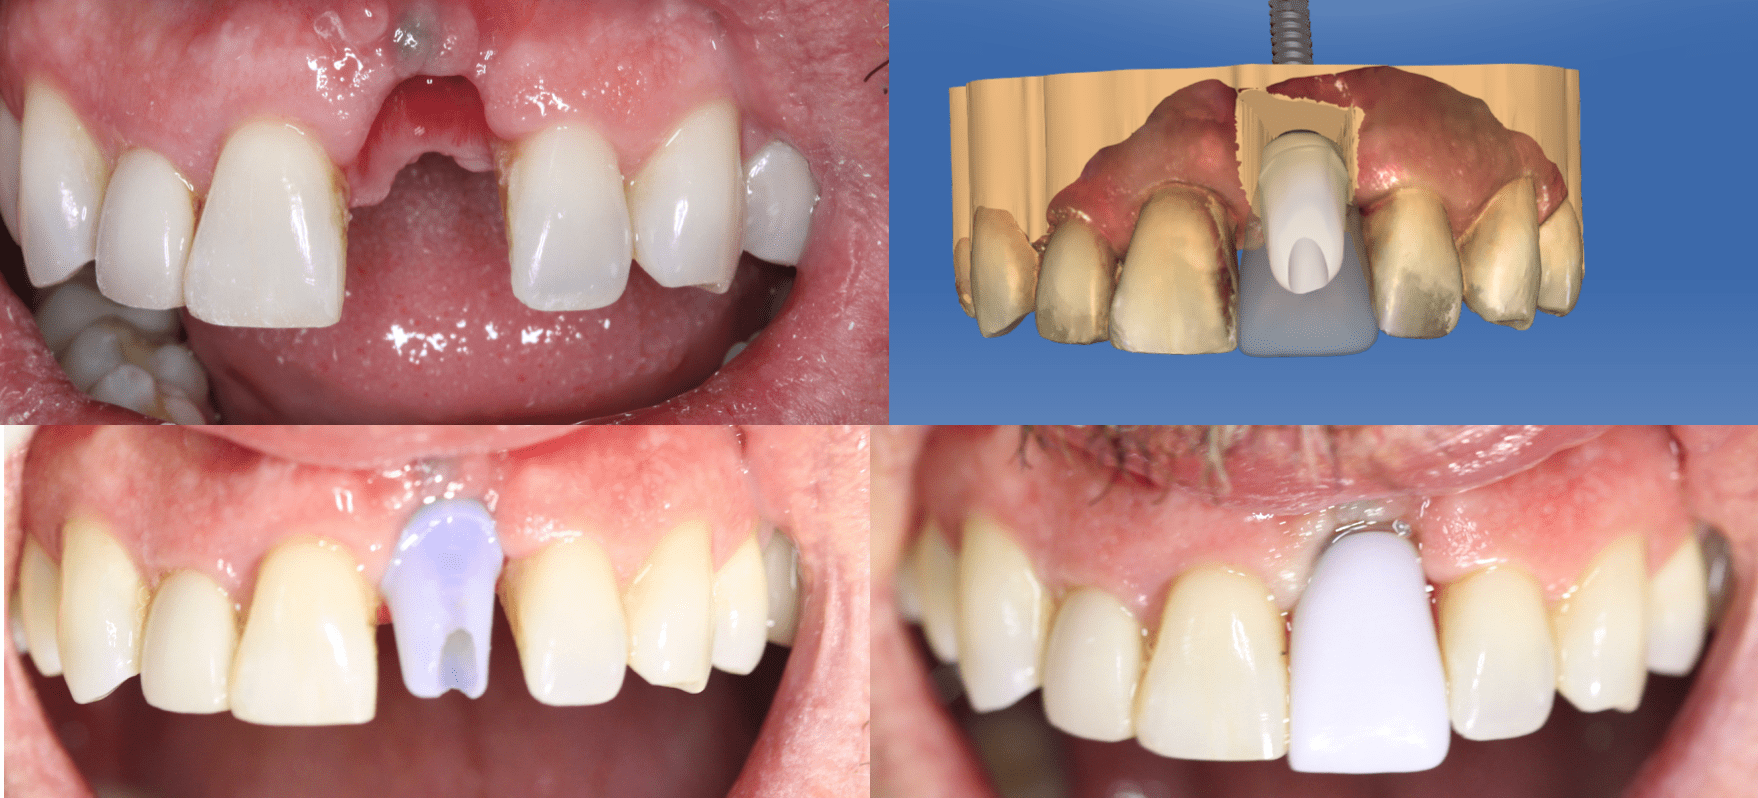
Try in. His tissue prohibited the seating of the Emax abutment and thus the final crown but I was able to assess the occlusion and contacts. Once the Emax framework is luted to the Ti Base it should seat and I can adjust the incised edge as needed.
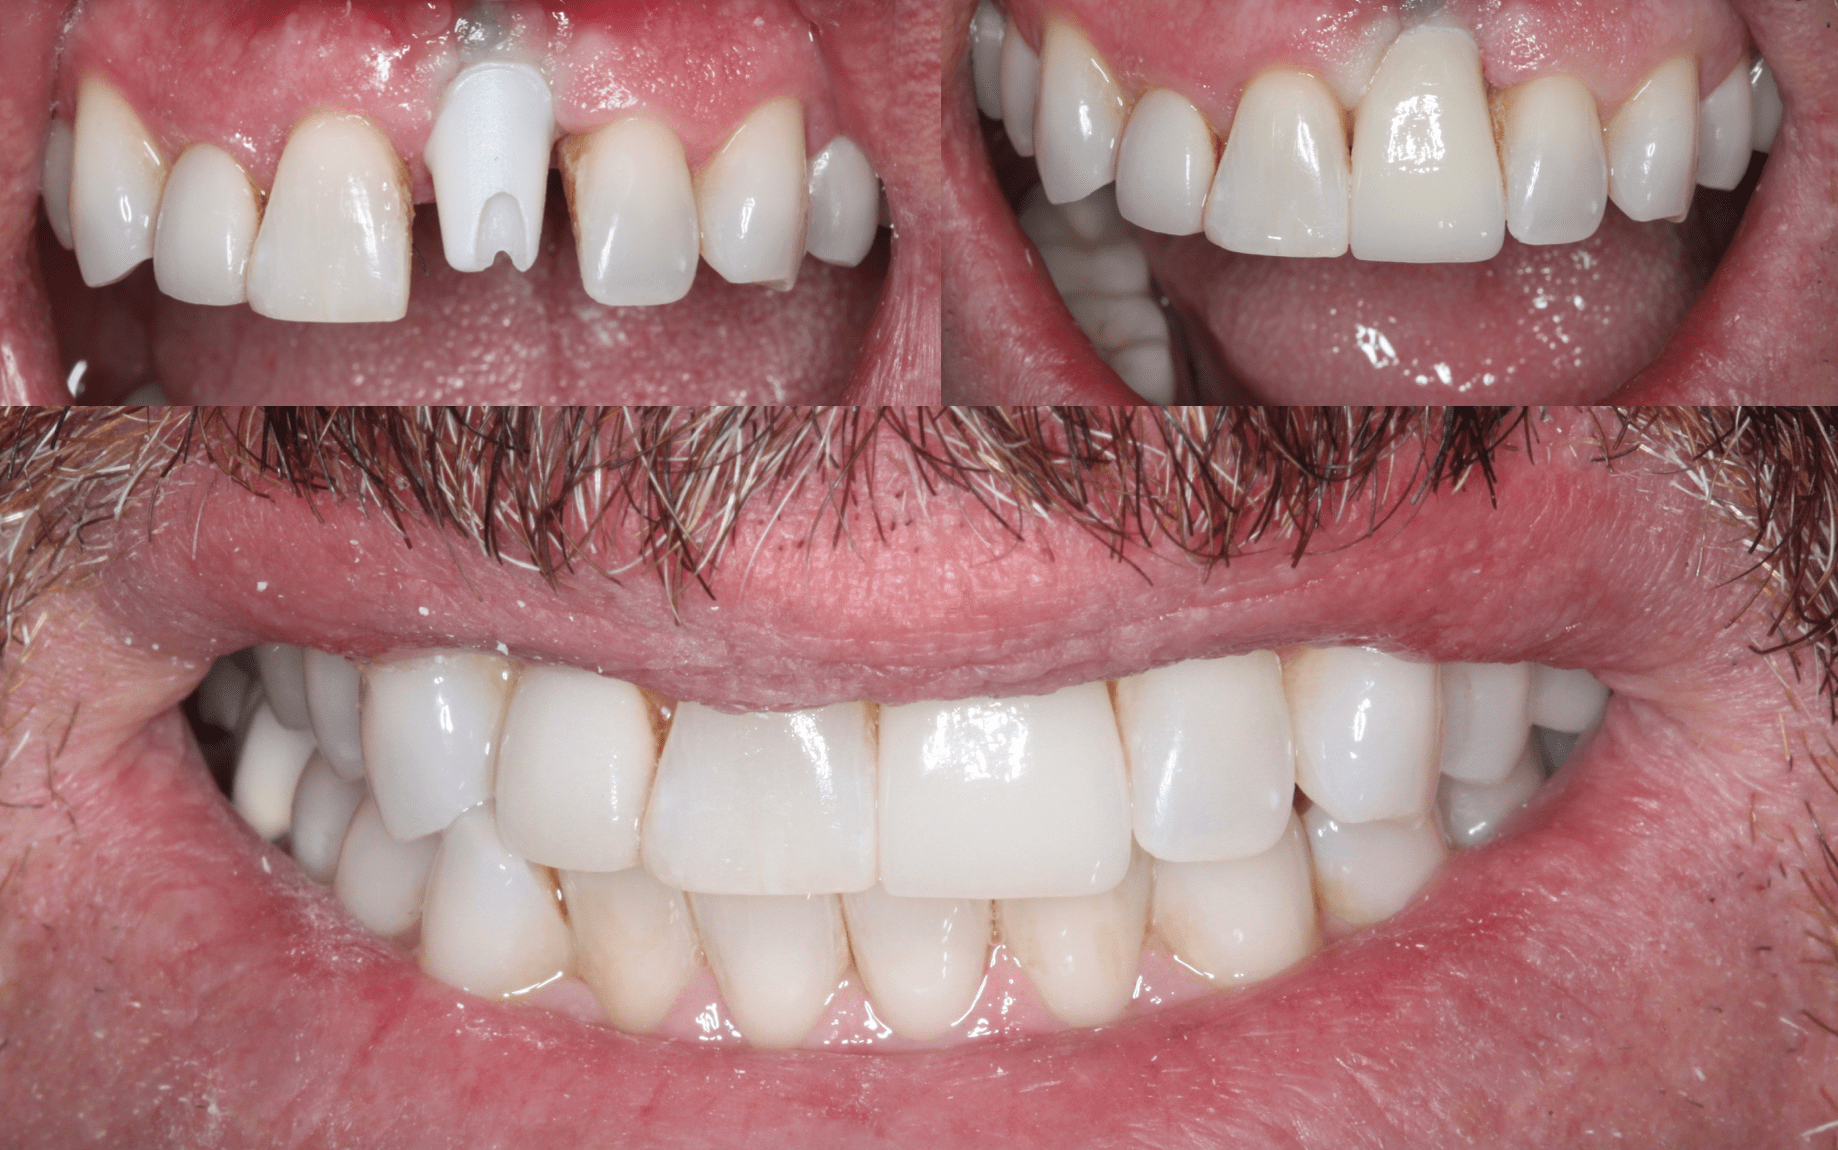
Again, saved by a low lip line! Obviously not ideal, and I know we should always strive for that but sometimes you just have to work with what God gives you. Note the supra gingival Emax margin!

