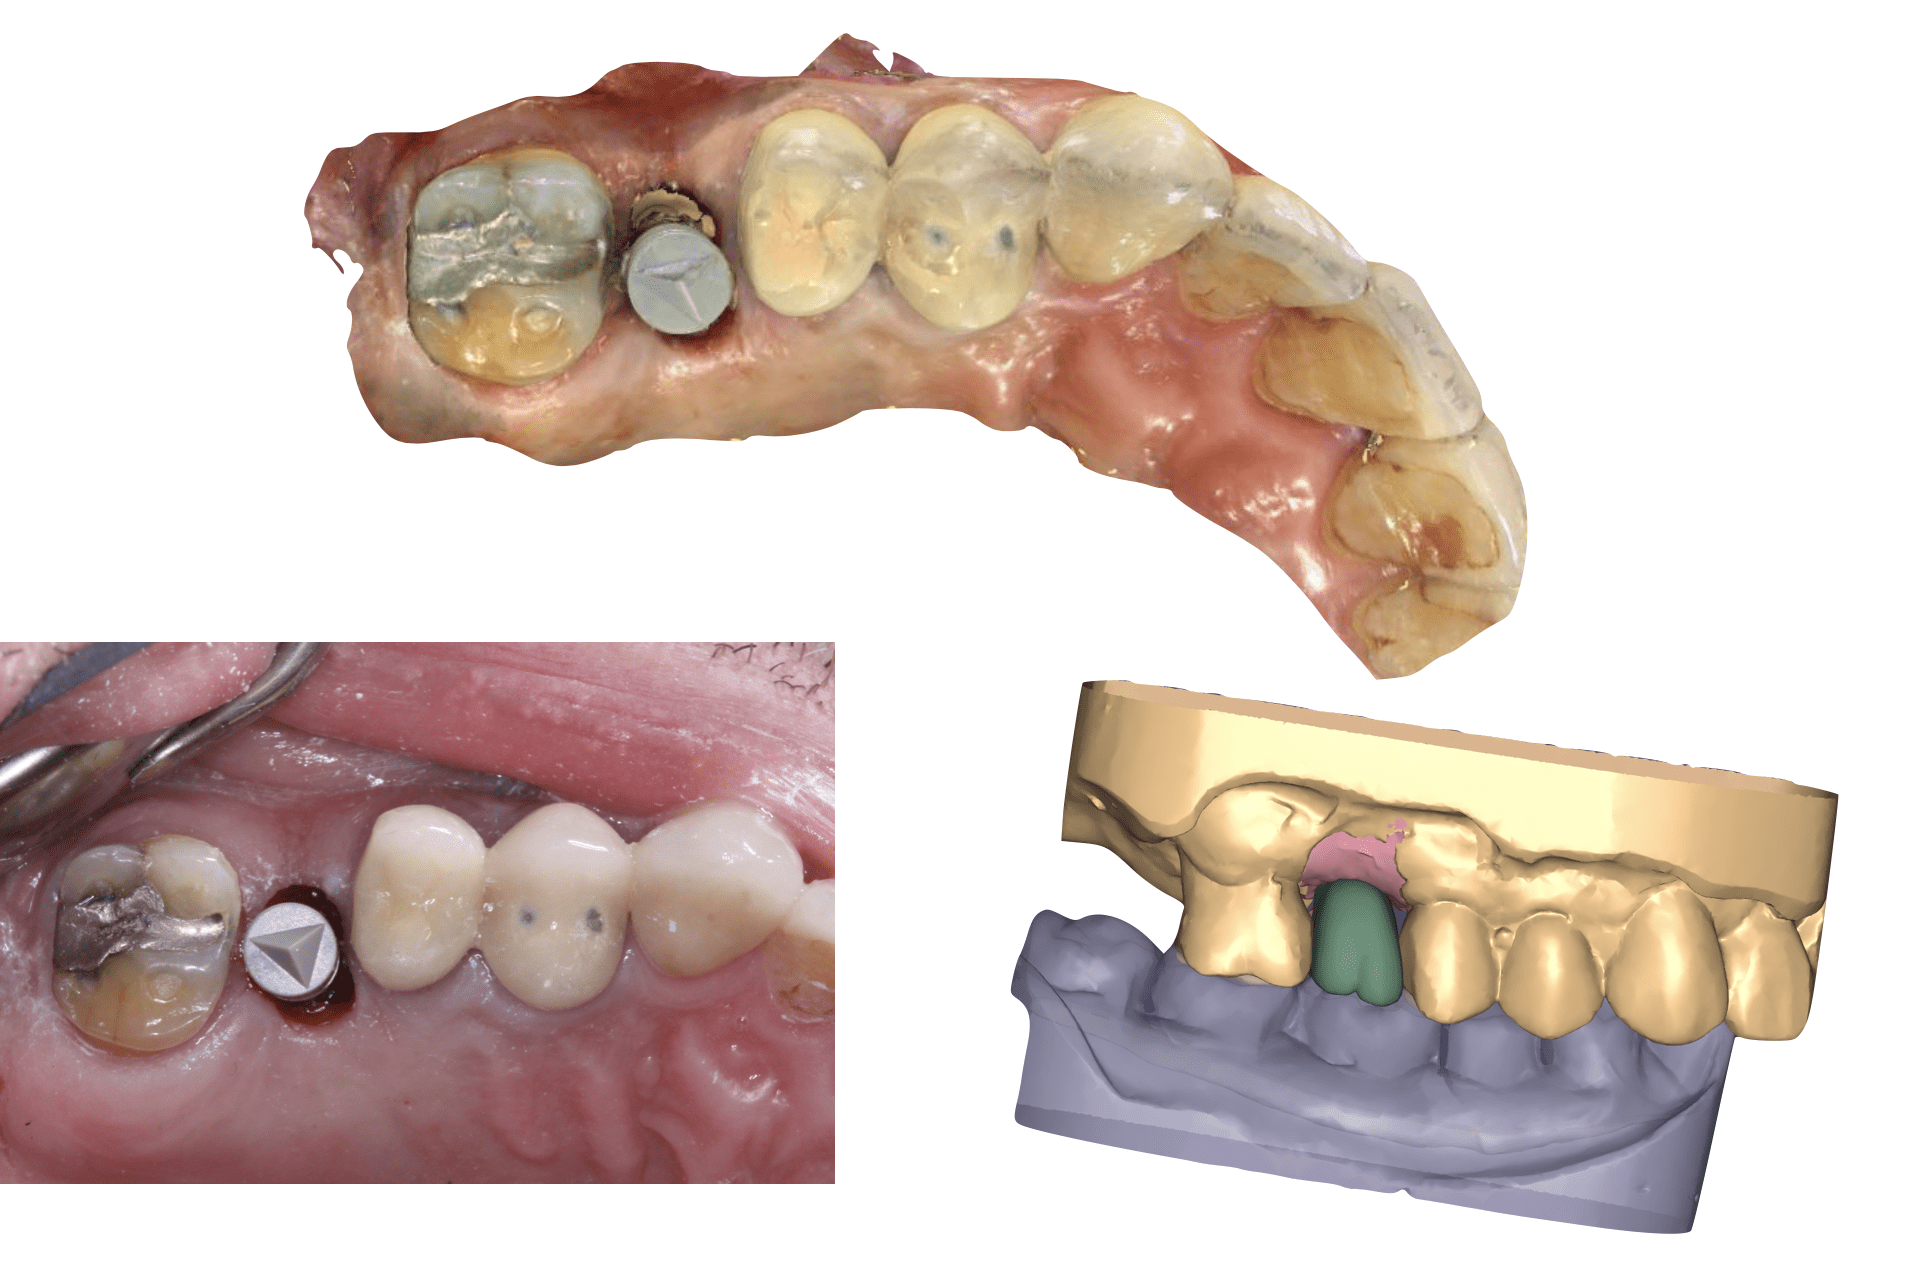
When Ivoclar first came out with their Emax abutment block, I was determined to do all implant restorations in house. I didn’t care that it took 2.5 hours, I was determined. Over time I have taken a bit of a staged approach and scanned and maybe milled and tried in on day one and then sintered and assembled the ti base and framework when the patient was gone and brought them back. I figured the ti base cost about $80, the block about $70 and cement and glaze was another $10 or so if you factor labor, so that was still a good deal. I was doing one of my 3D Printing Parties and I met Neal from Imagine Labs. Imagine is a milling center, a lab, and a distributer of DOF scanners and mills as well as the awesome NextDent 5100 and resins. He told me that he could either do a custom abutment or a screw retained crown from a digital file for $134, that includes the ti base, the milling, sintering stain and glaze and cementing to the ti base! Plus you can use a Sirona scan post!!! Well this I had to ty!!. A bit of a tough case, #3 was lost and #2 drifted mesial, a bit of a defect on the buccal so the Legacy 2 implant is a bit lingual.
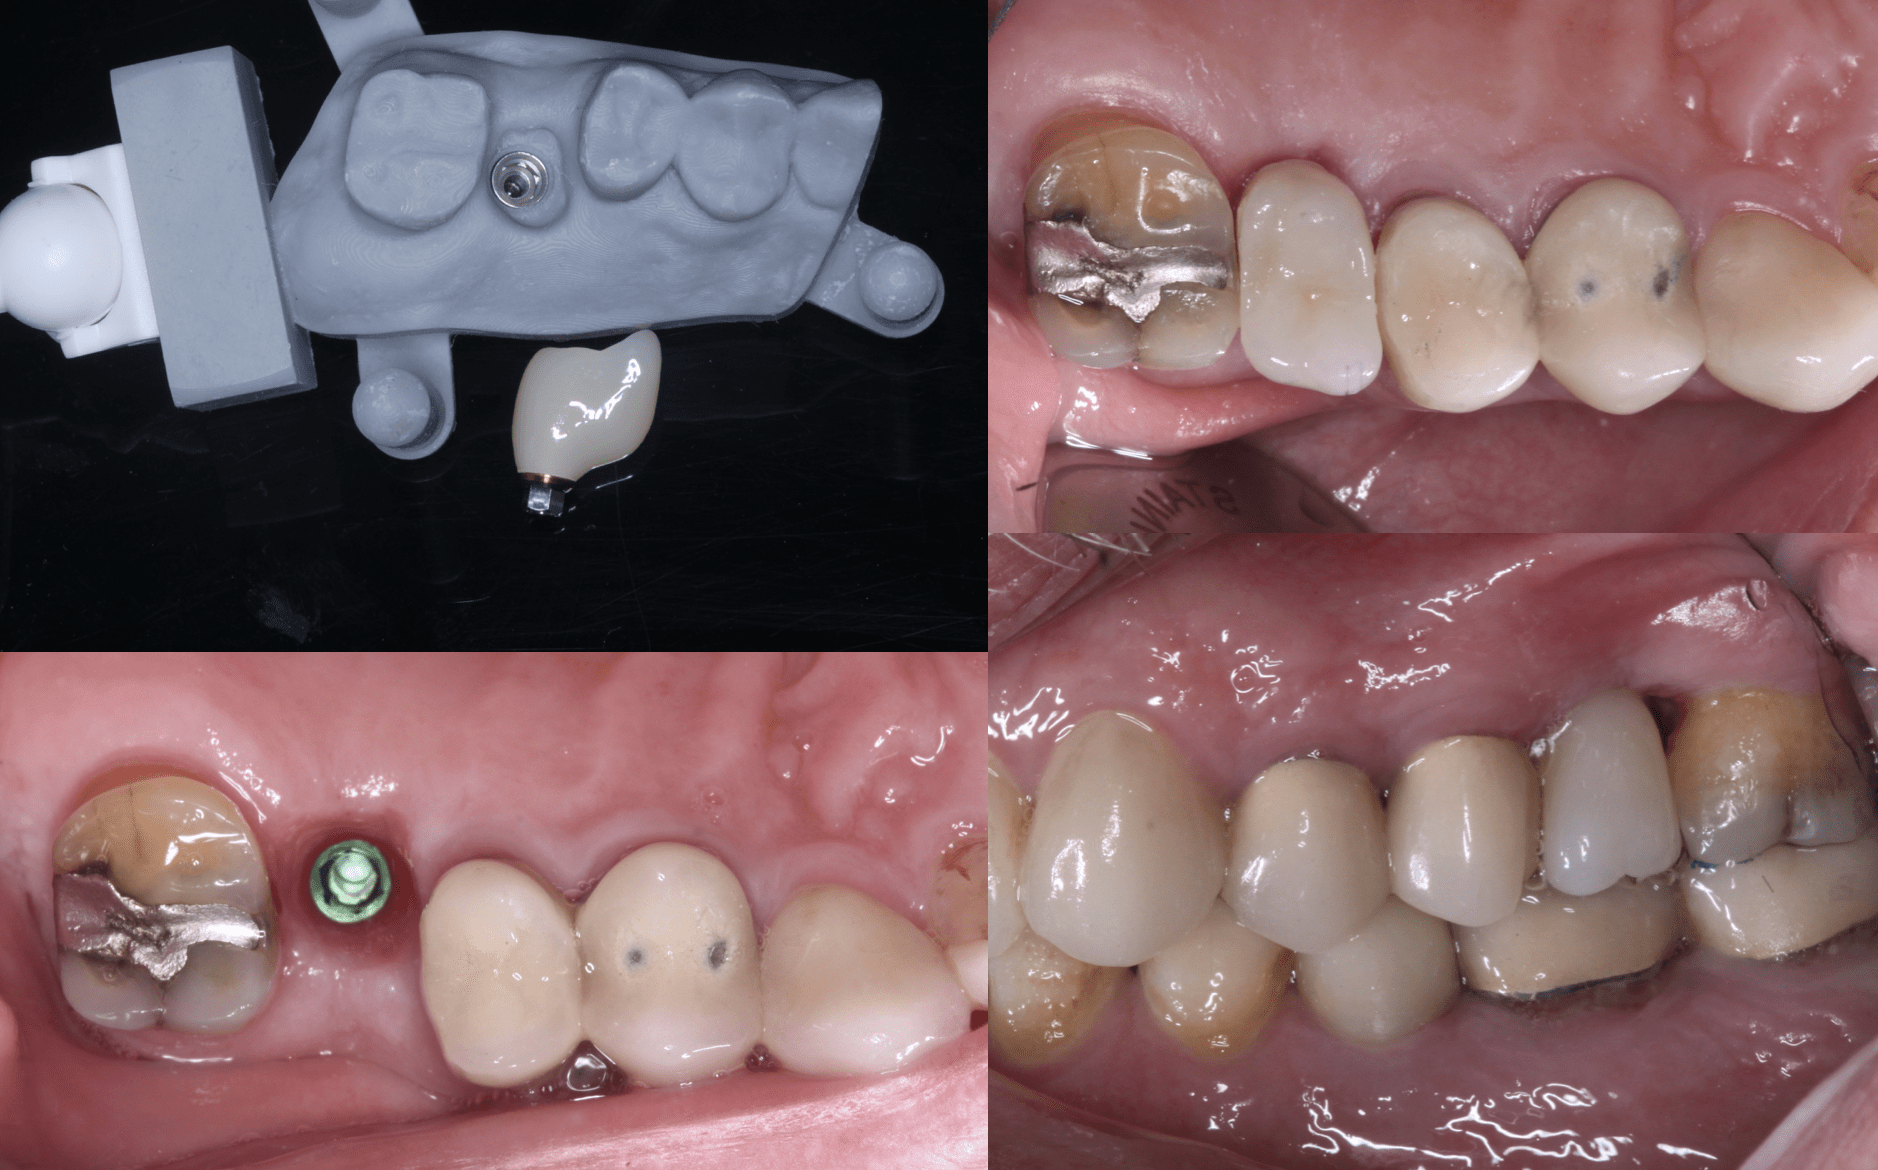
A 3D printed model can be provided but there is an extra charge. No adjustments at all!!! TBH it just doesn’t make sense to me to do these in house if I am doing them at a two appointment procedure at $160 just for parts and labor!!
Wanna learn more about using milling centers and getting FREE crowns or saving a ton on lab bills? Want to learn the latest and greatest in 3D Printing? Come to a Printing Party!! Next week April 4 and 5 I will be in Sonoma at the Klim institute and July 19 and 20 in Vegas!! Register below!!
https://www.eventbrite.com/e/dental-3d-printing-party-sonoma-tickets-54627092103


