This is my very first Guided Implant Case! I did this about 3 years ago and glad to say I have come a long way. This patient wandered back in for the first time in 3.5 years since the surgery! But there’s lots of stuff to learn so lets get cracking:

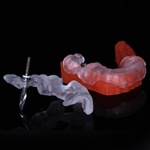
Tough case for a newbie. Retained root tip #19-ish. Thin ridge, not a lot of attached tissue. This was an alpha case for Implant Direct’s ILS program. The software never got released but the ID Guided kit was salvaged from it:

One of the huge drawbacks of a lot of Implant Software is the 3D Pan. Which is worthless. Its worthless as its effected by the position of the tooth in the panoramic curve. Teeth go all wacko around curves and are cut nicely in the sections that are parallel. Look at the laterals in the panoramic image, this patient actually has pretty straight teeth. Always check your implant angulation in the 3D. Lesson numero uno.

In the Pan the implants are nice and parallel. You can see with the Guide Sleeves that they are overlapping, so thats a warning that there is a discrepancy. Also you know its going to be a bad day when the patient starts bleeding before you start the surgery! Also look at the position of the implants relative to the arch in the guide. Although we have a lot of buccal resporbtion, I would have angled the implants a little more buccal to decrease the buccal cantilever. So lesson Numero Dos, check your sleeve position and make sure its matches your plan.

Wow where do I start! First and foremost the implant position on #19 is no where near where we planned it. I had to do a lot of contouring of #18 to get clearance. Finally I bag on myself for suturing and flaps, but thats just wrong! Not sure if I punched and flapped? But lost a lot of attached tissue. So lesson Numero Tres, respect the tissue!

Fast forward to two weeks ago. Some time during the 3.5 years she lost the healing cap on #19 and we replaced it with a bigger one. Again you can see the imperfections better here. On #20 we only have about 1mm of attached tissue plus look at how close we are to #18. The healing abutment is practically in contact with #18. Lesson Numero..err Four.., again plan your implants in the 3D view when evaluating adjacent tooth contact distance. In the Pan, I was cool, but obviously this is a restorative nightmare.

You can see the wackiness of this case in the abutment positions. For one, we are really lingual. Second we are convergent in our implant angulation. When I prep multiple teeth or plan multiple implants, I pay attention to the path of draw. Here I now have that annoying “Who’s on First”, where I have to try one crown in and make sure it goes down then slide the other tooth in sequence or it wont’t seat. With convergent paths of draw the lab have to angle the embrasures to make the case fly. No Bueno when I have to use my brain. So Lesson Numero Five, Guided Surgery is all about Crown Down Implant planning. In the software I had crown forms, I just did not use them. If you don’t have a crown form or proposal, use Barium Sulfate teeth!

Here you can see that my lab did a good job of covering for me. I can feel the pin pricks from the August de Oliveira DDS voodoo doll he must have. Here we can see a large buccal cantilever as well as that tight distal embrasure.

You can see the lack of attached tissue on the buccal of #20, also looking down on both teeth, they should at least draw, we can see we don’t so the seating of these guys won’t be fun:

You can see the attached tissue issue a little better here, also the occlusal table weirdness due to the cantilever. Anyway, great lessons to learn here. Lets hope my next cases are better!!! But these really drive home that if you plan your implants right, the restorative phase is a breeze. You don’t pay attention, then you have a fight on your hands!!!


