I am very happy to announce we finally got the Large Guide Sleeve into SICAT for the Implant Direct Guide Handle Kit. Prior to this we hobbled along with the small sleeve, which was fine it was 5.2mm in diameter which meant if you used the last drill in the Guide without a handle you could place up to the 5.2mm implant. But now with the Large Sleeve you can do Guided up to the 7mm Implant!!!
If you don’t own the kit yet, stay tuned. If you attended one of my hands on courses you have permission to get the kit. If not, I just shot the instructional video which is being edited now. You will just have to watch the video first and then be able to the purchase it.
I don’t know why, but this is one of my favorite cases, I just love the vertical BW shots:

Patient suffering from Titanium insufficiency: #19 missing for 8 months. #30 coronal fracture.

Scanned the patient. With the exception of #30 being an immediate this is a great first case for the noobs:

Learning a lesson from my “Implant Time Capsule of Sucky-ness” album/post, no matter how easy you think the case is, always start with a crown form and work back. In this case I always like to turn off the CEREC proposals and look at the Pilot Sleeves relative to the edentulous space, then fine tune the positions via angulation of the implant:

We know that all teeth in the head lean to the buccal except for the lower molars which lean lingual due to the Sub Mandibular Fossa and thus the Curve of Wilson. So respect that!:

Slightly lean the molar implants Lingual. Use the Pilot Guides (set them to 30mm) to see this:

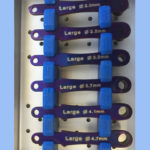
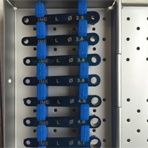
The Implant Direct Guided Kit has only 4 handles with two ends. The first two handles have inserts that fit the small sleeve, the two larger ones have inserts to fit the large. To adapt the small handles to fit the large sleeves you just pop on these spacers. Really simple, and it cuts down on the number of handles to keep track of:

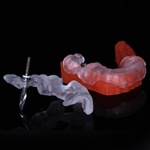
Sicat now just places these irrigation channels directly in their Guides for accessory irrigation by a monoject syringe:

Use a salvin 5mm punch, ID does not sell punches, starting with #19:

ID uses a total of 6 drills to place a 5.7mm, I believe you can skip a few, but I just go through the series, its “smoother”:

Remember you can use the Spectra System Guided with the head of the Hand PIece as a stop by setting the D2 to the length of the long drill minus 1.5mm for the Handle. On my Nouvag MD20 this is 22mm but measure your own!:

Another trick for limited opening is “pre-load” the drill into the Guide handle and then “rotate it” into the sleeve:

I playing with the HA coated. I start with the HP until I hit 45 Ncm, then switch to the ratchet to index. As you can see we are equidistant from the adjacent teeth contacts. A bit lingual due to the defect but still in the center of the future crown:

I’m totally geeking out over that Vertical BW! Love the depth, spacing and angulation:

Ok now for #30, I learned my lesson about using the pilot through the tooth! What you can do is take the Carbide 557 you would use to section and “pre-drill” a hole through the dentin into the furcal bone. Then when you use the 2.3mm pilot through the tooth you are just drilling bone not dentine. Muy easy!:

I just love taking this image. Its such sacrilege to drill into a furcation! Here the dentin of the root stabilized my drill so when I section and remove the roots I have a nice “pilot” to guide the rest of my Guided Surgery:

Section and remove the roots. Hard to see in the sea of heme but we have a pilot hole right in the furcation:

As with the other side, go through the series:

There is a special crestal bone drill for the 7mm. Placed 7 by 11.5 with great torque values:

Again, equidistant from the adjacent teeth, centered bucco-longually and mesio-distally. I advanced a little more apical to get it more subcrestal:

Another trick I learned with “tacking” down the membrane with the healing abutment is to drill a hole thats bigger than the screw. I have made the hole too small in the past and the membrane “spins” when you screw it down. Direct-Gen By Implant Direct MFDBA and PFTE sutures also from ID (2 weeks to dissolve):

Planned and Placed. Too Easy!

Patient came back a few months later, nice healing of the tissues.

When the implants and abutments are centered in between the adjacent teeth contacts its easy for the lab to give you a decent result.

Stock freebie abutments from Implant Direct’s Legacy line. You can see that the lab did not need to prep them.

A little trick, I started using just ripped up sponges instead of cotton. They come out a lot easier and aren’t so soggy if you get moisture.

Pretty good result. The patient got a scaling after the crowns were center. I did not want a lot of bleeding in my images.


