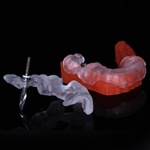
Just completed this case and it took a while due to the patent’s schedule. Placed these implants over a year ago. The Patient was happy with the arrangement of the teeth in his denture so we duplicated it twice. One duplicate was saved for later, the other was attached to a SICAT bite plate and the patient was scanned.

You can see the benefit of two grades of Barium Sulfate. The teeth are nice and radio opaque so I know exactly where to put the screw holes in this hybrid. The flange is also radio opaque so that I can see where to place my pins.

Tried the guide in the mouth, did my punches, placed my pins and then I was off to the races.

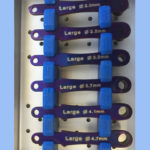
In this case I used the Nobel Tapered Guided Surgery Kit. Placed the implants through the guide.

Took a stock impressing and sent to Burbank Dental Lab. Does not matter if its closed tray, open tray or abutment level. All you want are some resin jugs and a custom tray for a later, more accurate cast.

Luted in the mouth with GC resin. I must say I prefer Triad as it has this nice light cured flowable. The lab also gives you a custom open tray as well.

Its important that after you lute these in the mouth that you take it off, let it relax, then place back in. The copings are then picked back up with a custom tray and impression. I place cotton balls in the screw holes so that no impression material gets in.

One lesson I learned the hard was is that there is a difference in getting CO in a removable case and in a fixed case. Getting a bite in removable is easy and the prosthesis can “give” a little and it will shift back when the patient bites. Not so with fixed, if the bite is off my microns it can throw the whole case. Get that duplicate of the radiographic guide out, punch a few holes in it for a few titanium cylinders you can get from Implant Direct.

In the mouth, pick up the cylinders with any old resin, in this case I used Luxatemp. Now your bite has gone from a wobbly removable bite to a fixed bite. Unscrew the radiographic guide. Now the lab can screw it back on the model and have a very accurate mounting and can then design the metal sub structure.

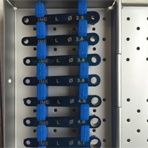
I am liking the Pawn Post design as it can be really thin. The big issue is that you have to use the radiographic guide and really screw it down well. Each post corresponds to a future tooth so there in no leeway

Wax Try in and processed Hybrid. You can see how small we can make these with a Pawn Post design.

Sheffield test repeated. One screw holds the hybrid in while you bounce on the other side with your finder. No rocking allowed! If so make sure you relieve whatever is holding up the case. Anaxgum composite over endo sponges in the screw holes.

Final! Patient is thrilled, nice lip support. Well seated metal sub structure. You spend so much time in the process and after its done you rarely see the patient, just maybe in recall. This is why I love implants, taking a patient from no teeth to getting all their teeth back!


