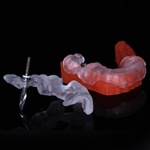
Here is a start to finish walkthrough of an implant and screw retained Emax crown. #18 WAAY in the back in with severe titanium insufficiency! Lots of bone, scanned up for CEREC Guide with a Medium Reference Body.

Always important to check the placement of the implant both with and without the crown proposal. Look at the adjacent teeth anatomy with your CEREC scan, can’t do that chorused with other systems. Place in harmony with the curves of Wilson and Spee.

In it goes, a 5.2 by 10 Legacy 2. Again, use the 2 not the 4 if you are planning custom. If you want stock, then use the 4 with the awesome new platform switch.

Patient went bye bye for 4 months and cam back. Hard to get in hence not switching out to a contour healer previous. We didn’t get 35 Ncm of torque hence the lack of placement at the time of surgery. Make extra surge that the notches line up in the scan post and scan cap. You can confirm that in the scan if you capture the buccal, which well, you should.

Due to time constraints we did this as a two appointment job. Scanned and placed a contour healer. The ceramic framework is not fully seated on the Ti Base as its leaning on it, but these fit well!
I place the Ti-Base and the Emax Framework in the mouth as one unit to get the index right and screw it down. Then work on my contacts and occlusion. I always get the occlusion adjusted in the Blue state.

Back in the edentulous space after staining and glazing. Ready to go through my handy dandy opaquing protocol.

So I start with Hydrofluoric etch for 20 seconds, silane for 60 seconds, torque to 30 Ncm. A good amount of teflon tape. Note how well the teflon tape opaques the screw! Most of our work is done. A little bonding agent then opaque flowable (Flow It ALC) and finally the composite. Hoila!


