Here is one of the few cases you really can do non guided easily. Two rooted pre molar with the distal root in the position where the implant should go. Thick buccal plate on both the buccal and lingual. Actually the perfect first Immediate case for any newbie as well. Here is the deal, when doing any immediate temporization a BIG issue is temporary acrylic or composite and cement getting into the socket. Its devastating if any is left over as you will not have bone formation. I can’t wait for the Telio CAD temp abutment block to come out but until then, you can use an Emax abutment block and just burn out the Ti-Base at 4 months and use another block or stack to this one if you want.
Scanned in CEREC. There is certainly debate on immediately temporizing pre-molars. I personally do it all the time but understand the risks. And as I say in my lectures, while most are looking at shorter implants, I tend to use longer ones as I know where my bone is with the CBCT. In this case we planned a 4.7 by 13mm Legacy. It has a 4.5mm platform that corresponds to the TSV 4.5 Scan Post and Ti Base.
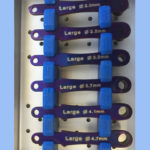
Loving the new IME Luxating Elevators and Forceps. Designed especially for implantology, these tools are super think to work on displacing roots rather than breaking bone plates.
I always start with the lance bur. I used an extender for all the drills as the hand piece was bumping into teeth and I did not want any deviation. Planning for about a 2mm sub crestal placement in the socket.
Super smooth surgery. On a site note I actually opened up the osteotomy to the last drill for a 4.7. This guy had some dense bone. I would normally stop at the 4.4.
Scanned with the TSV 4.5mm Scan Post. Note the image of the screws. The Ti Base screw from Sirona is a little wimpy when you torque it and has less threads. I just use the abutment screw that came with the Legacy Implant. The head is longer, so it may not be ideal if you have a short crown, but for the most part it is way more robust when it comes to torquing.
Scanned in CEREC, with my Omnicam. Another great benefit is that there is no powder to get in the socket. Although it looks like we have a lot of Gap Distance on the buccal, Its definitely under 2mm. I still got some graft in there before I placed the temp.
Case designed in 4.2 out of occlusion and out of excursives. They really need a set of 14 blocks in LT. This took about 25 minutes to mill.
My other beef is that the sprue is ALWAYS on the inter proximal. No bueno!! There has got to be a way to rotate the block.
In the mouth with minimal adjustment. Note that we are out of occlusion in all excursive and centric marks. He had some bone loss on the rest of his teeth, so I am not concerned with the dark triangles. That being said you do want to open those gingival embrasures in your temps. Also I have to say that seating an abutment or screw retained crown on an immediate with the socket open is waaay easier than playing with the tissue and bone after its healed.
While sintering, I took the Ti-base and placed it on an analog and san blasted it, keeping the screw hole covered with some cotton.
Got the new Ivoclar Abutment Cement, which is the recommended cement for the Ti Bases. Its opaque to block out the gray and thin to really occupy the space. Make sure you over bulk the occlusal aspect of the Ti-base well as this stuff can really run into it. Its tough to clean up though, but very tenacious. Make sure you use the monobond on the Emax and the Ti Base.
Screwed down with hand pressure first, placed a sponge over the screw hole.
As we got a nice amount of torque at placement we were able to torque the crown down to 30Ncm. Placed some opaque flowable and some A3.5 paste. A little ochre stain just to keep it real ;} Again this is not the final, I want a little more characterization and want to get the crown a little closer into the occlusal plane, just slightly out of occlusion. Gawd I love this material, no worries about cement in the socket as this was all cemented extra orally.


