Here is a case I did where I had to get really crafty! Patient came in before to get treatment planned and then got his appointments mixed up for the surgery! So we planned the case but did not submit for the guide! No worries, had to do it free hand. Obviously lots of dental issues but the patient wanted to concentrate on the lower anteriors. Decided to remove all lower incisors and planned for a “mini hybrid” using an I-bar framework, composite teeth and Anax-Gum gingival composite.
Although there is some substantial bone loss, still more than enough for 3 3.7 by 11.5 Legacy implants. Only had 2 Legacy 2s so I used a Legacy 3 for the 3rd. Sorry for the lack of surgery photos, it was a blood bath! Note the taper of the 2 compared to the 3. I like the 2 better
Gave it 3 months to heal. So when splinting multiple units, any contraction of the PVS impression material can lead to stress in the hybrid. So rather than a simple open tray impression I decided to do a jig. I heard a great idea! Rather than using GC Resin or some type of Acryllic. Why not use composite, especially something like Build It-FR which is what I use for core buildups. Its got low shrinkage, and can be light cured.
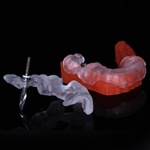
We start with some floss to make a scaffolding. The same process goes into lab made jigs. Next, Buildit FR is flowed around the scaffolding and around the copings. After the material is set, a thin diamond is used to cut the jigs releasing any tension caused by the bulk of material. The jigs will be then re-attached with a smaller amount of material.
How many times have you done an open tray impression and buried your open tray copings? Come on, I won’t make fun of you ;} I do it all the time it freaks me out. Try this cool trick! Stick a Bend a Brush in the screw hole and cut it. Hoila! No more fishing for your copings. You’re Welcome!
Clear off any excess material, but you can see how easy it is to get back into your impression coping screws
I have always wanted to do a “mini hybrid”. In this case we had a lot of bone loss and long teeth. Could we have gone with a traditional screw retained PFM? Yes but we would most likely need to get really expensive waxing sleeves. Also, based on the adjacent teeth, we may lose one or two, so having composite teeth and gingival may be a better option as we can just add a tooth or two easily. Designed and milled by Custom Direct, then off to Jack at Level 3. Titanium opaquer was used after placing retention grooves on the frame.
Ivoclar Phonares teeth used with Anaxgum composite. Plus the real artistry of Jack. I ended up rounding the edges and making it more convex.
A little teflon tape and etch, composite. But filled in well. Hard to see the screw holes. We had a bear of a time finding a long enough screw driver!!
And here is the final. I do not think we could have gotten the same esthetics with PFM or Zirconia. I ended up using the long hex driver, instead of the hand driver and just barely reached my screws!! This is so much fun! Will get to the rest later.


