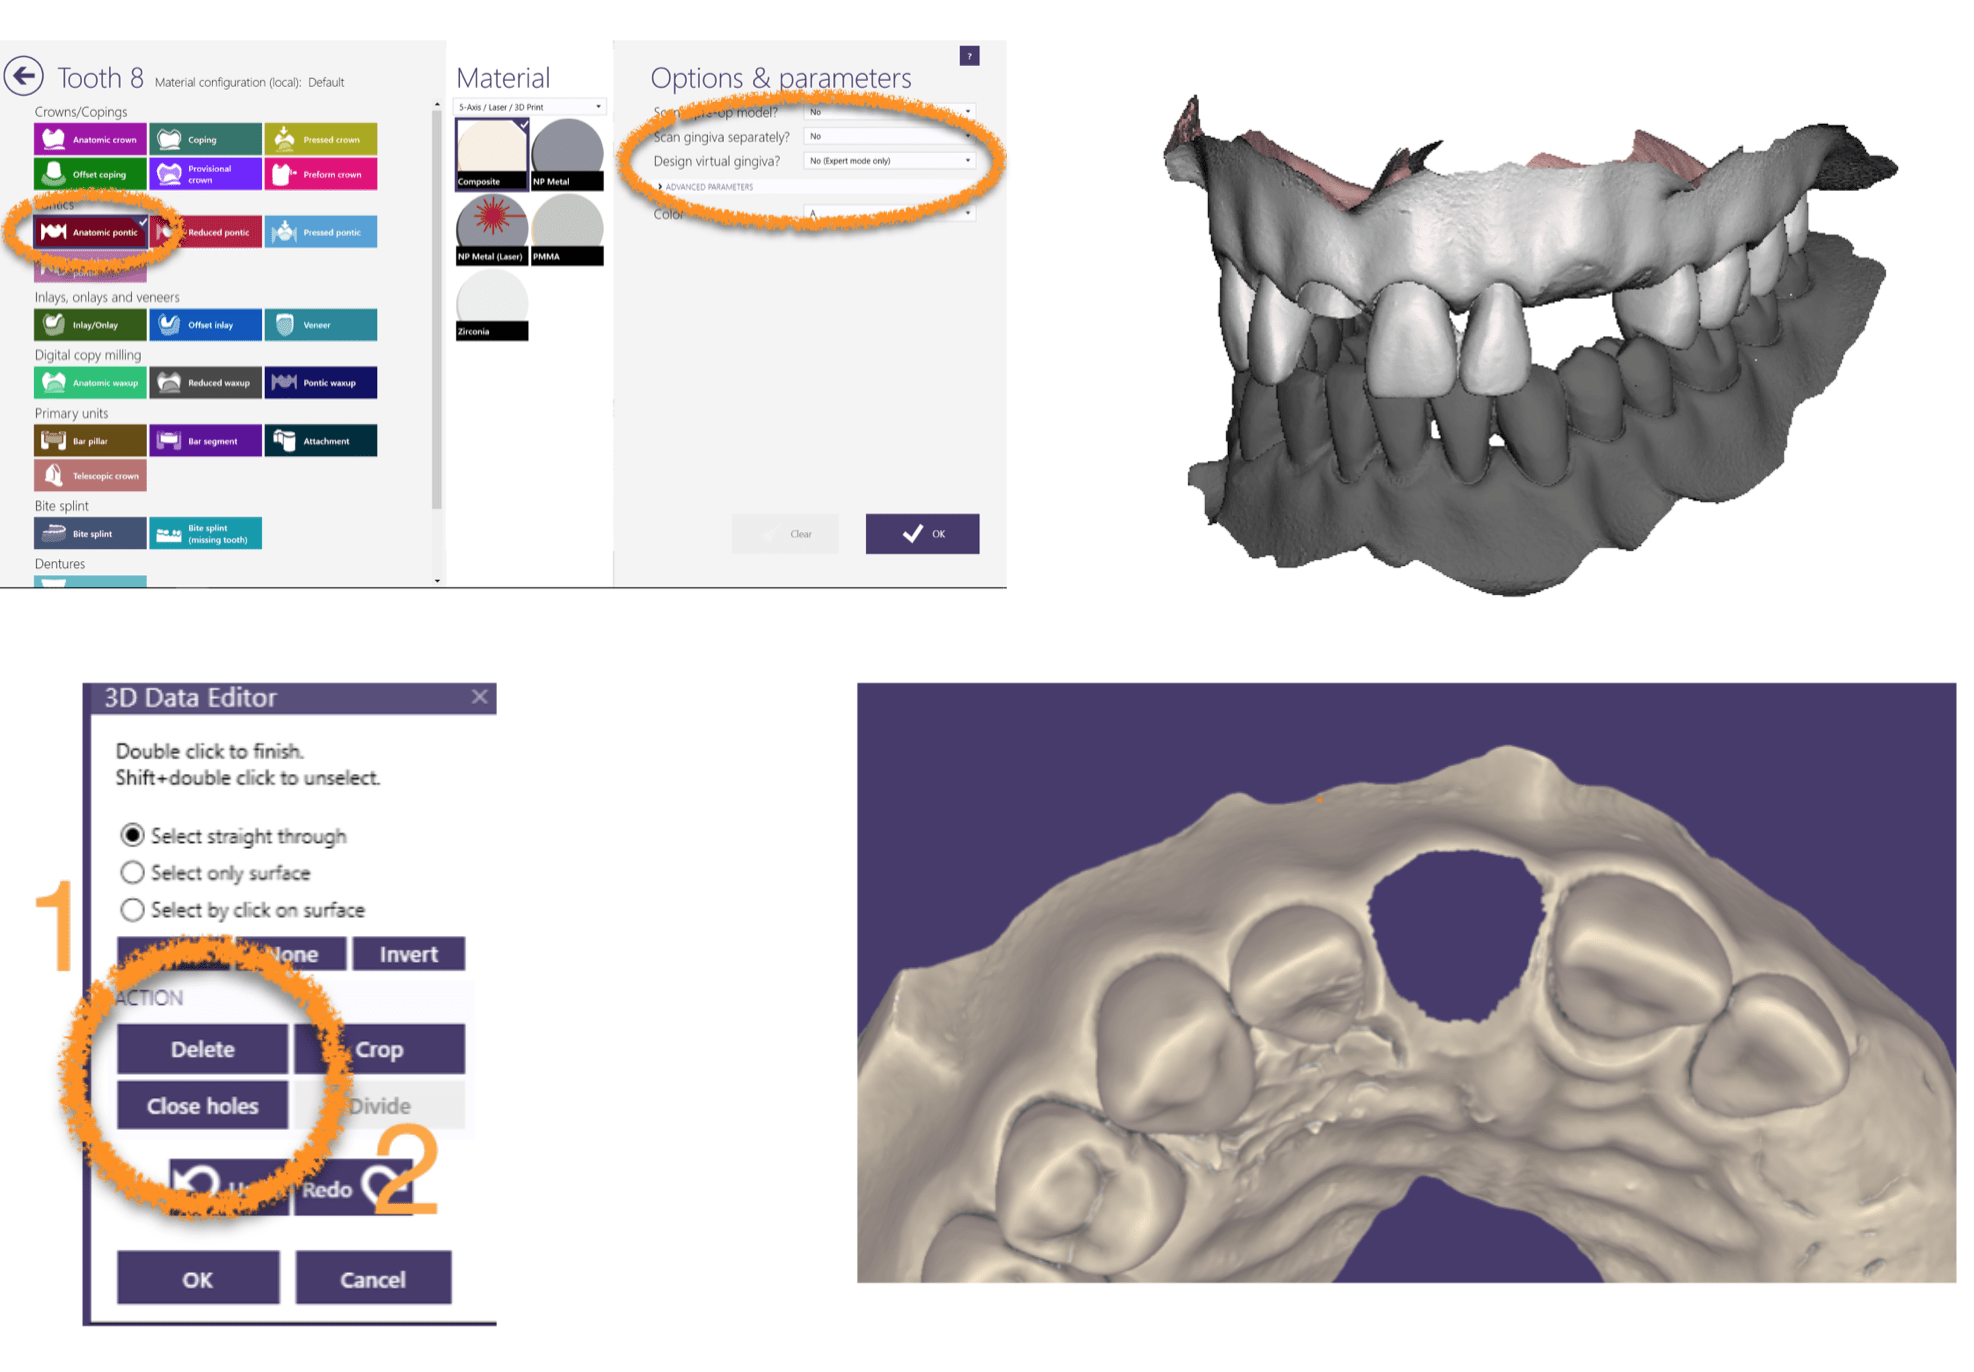
If you have read any posts of mine of late, read my book, Dental 3D Printing Made Easy, or have been to my courses you know I am all about Meshmixer. Meshmixer is a free software that allows you to modify STLs so you can print them. Its free and very powerful. But that being said, you have to jump through a few hoops for dentistry to get it to go. Enter ExoCAD. ExoCAD accepts any STLs and allows you to do some really cool 3D printing with your CEREC or another scanners STLs. Just playing around here with a typodont, but we have #8 fractured at the gumline and we are missing #11 and #12. In the ExoCAD software there are buttons for restorations just like CEREC. There is no “Flipper” button yet. So we need to jump through a few hoops. We can design a Pontic and on the Pontic we can add gingiva. In this case we are adding “pontics” at #8, #11 and #12. Its important in the screen where you select the restorations that you make Gingival Design “Mandatory”. The next step is we have to get rid of the fractured #8. So easy in ExoCAD, just outline the area you want to cut out, hit “Delete” then select a larger area and “Close Holes”.
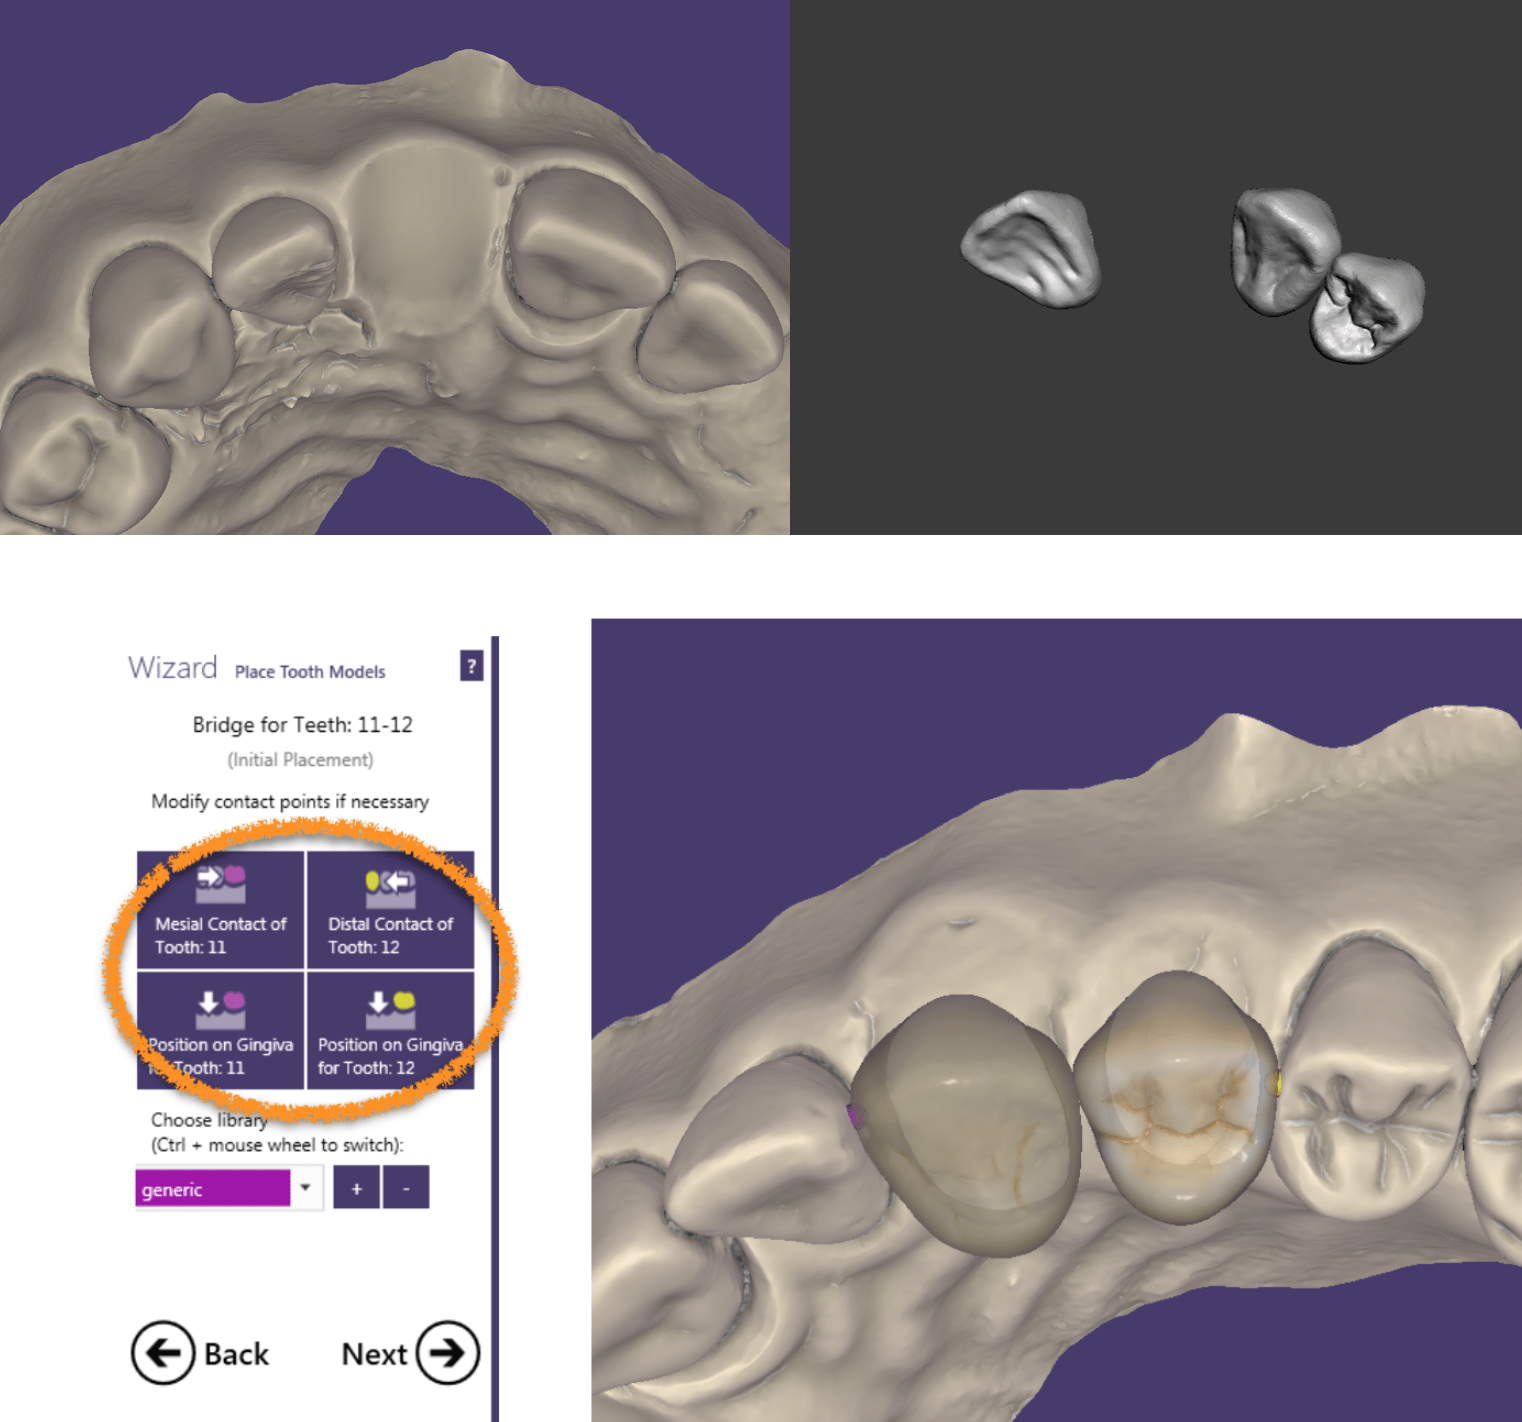
Everything is “Wizard” based in ExoCAD so you just click on the adjacent teeth contacts and where you want the “pontic” to touch the gingiva. There is another wizard guiding through moving and shaping the teeth, and you have to “adapt” to the adjacent contacts, occlusion, and adapt to the ridge. Export the tooth pontics as an STL.
 http://www.Digitalenamel.tv
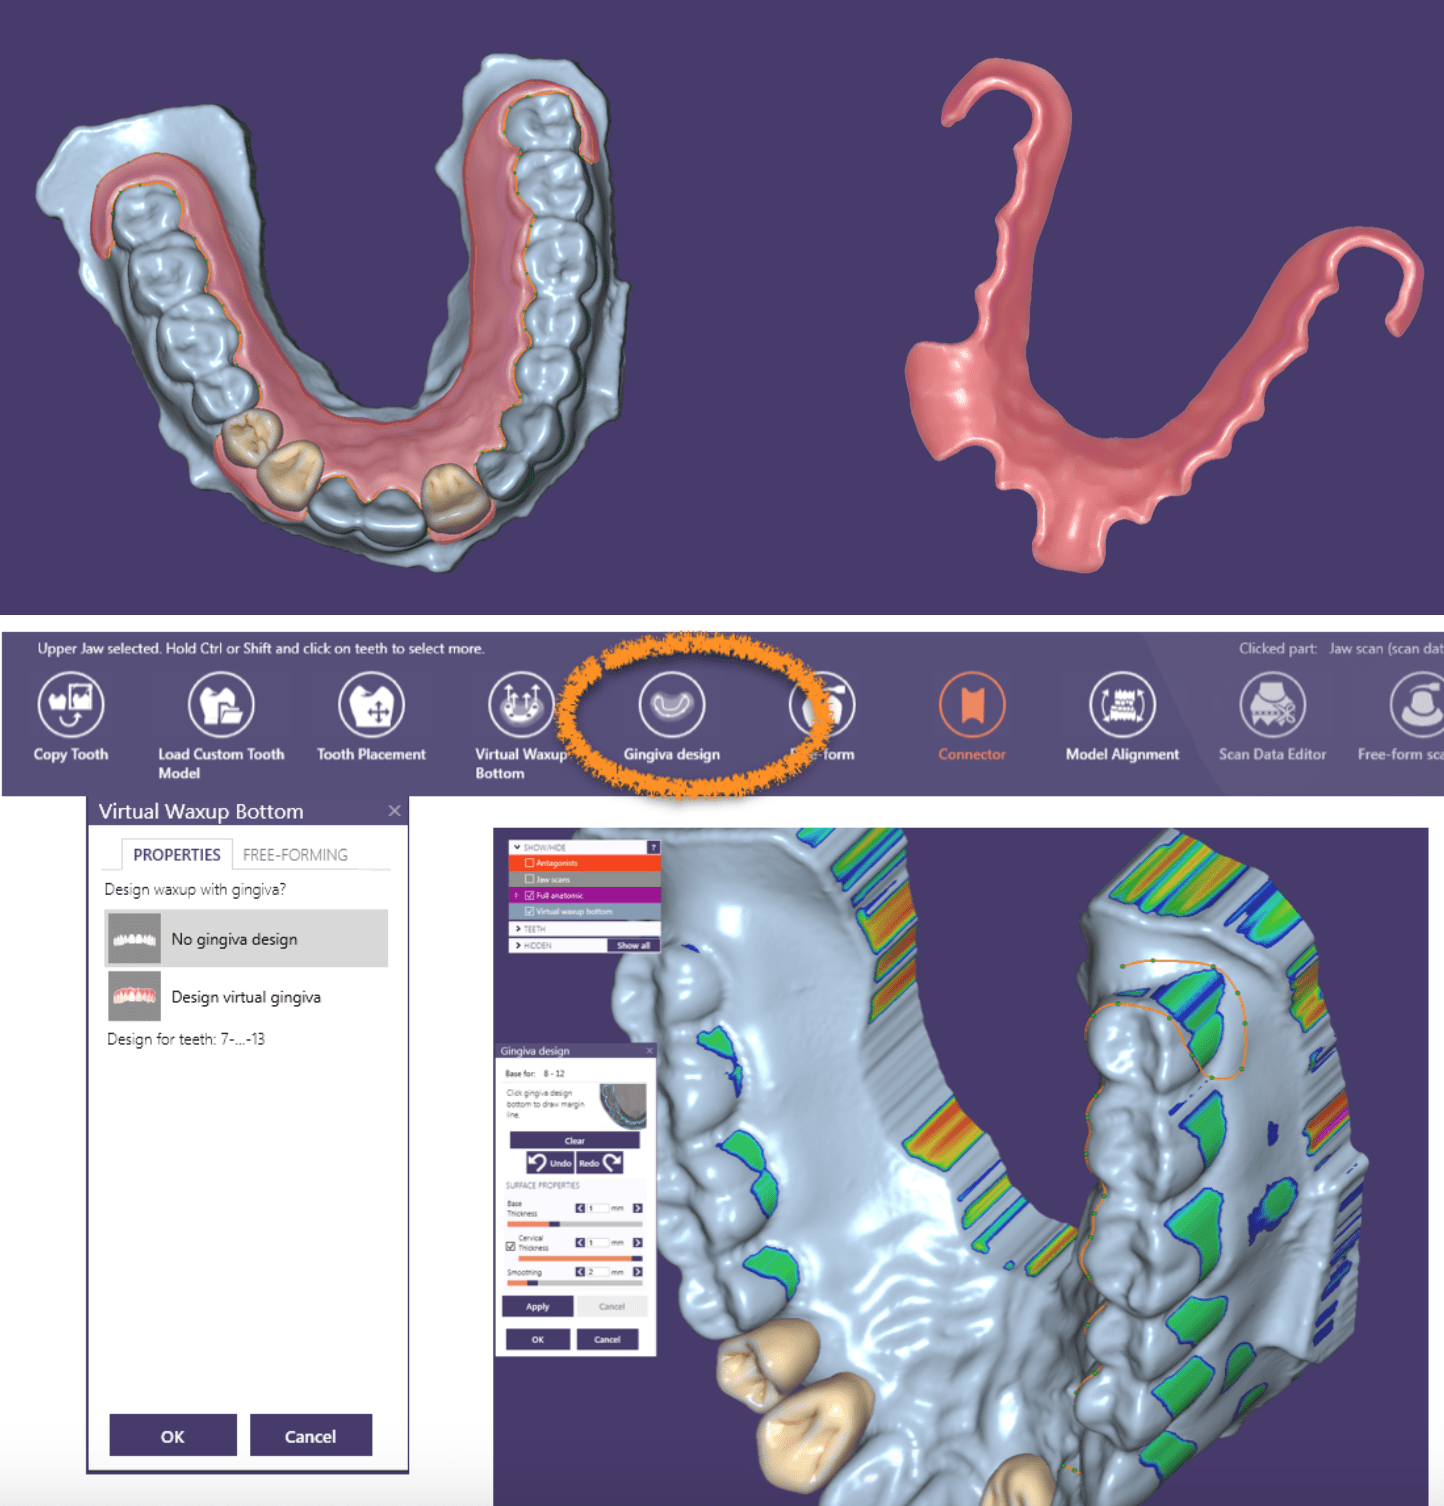
If you are in “Expert Mode” which is just a toggle on the right hand side. You can select “Virtual Waxup Bottom”, this allows you to draw the “margin” of your flipper. I kept it off the linguals of the anteriors but lipped it up on the linguals of the posteriors and even gave it a little hook around the distal of #2 and #15. Like the teeth, export now the gingival portion as a separate STL.
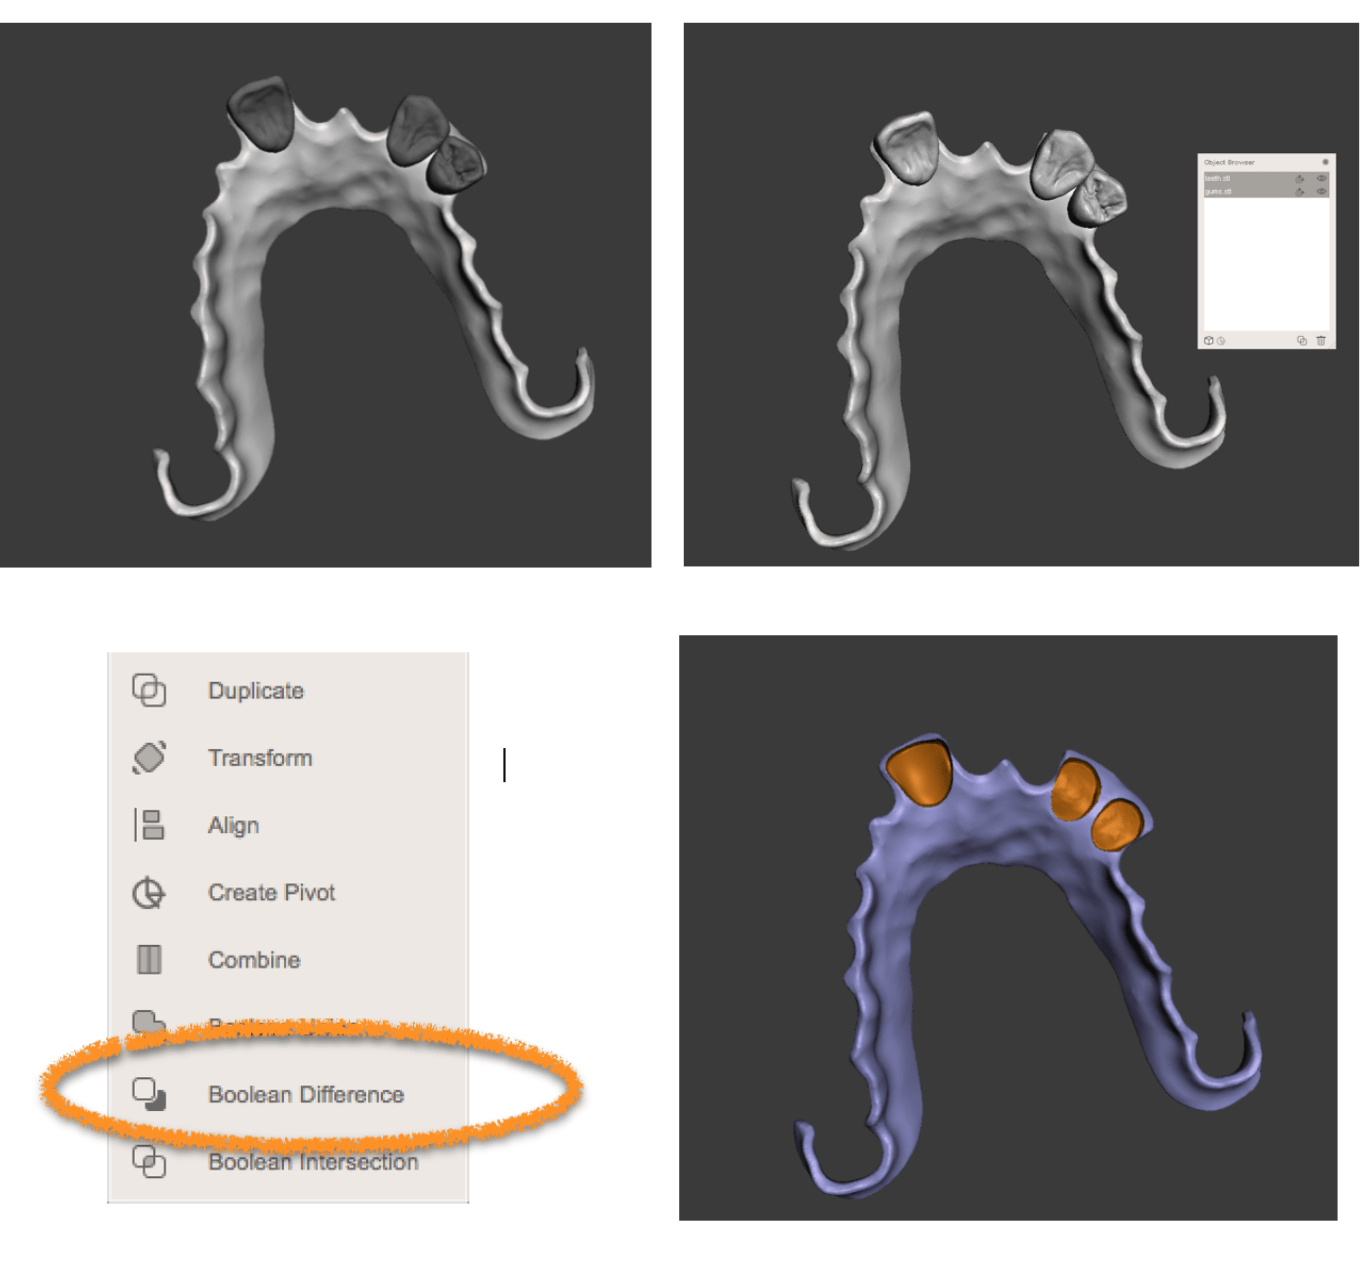
This next step literally takes a few seconds. Open your teeth and gingival portion into Meshmixer and do a Boolean difference. This goes fast as ExoCAD really exports out nice clean models.
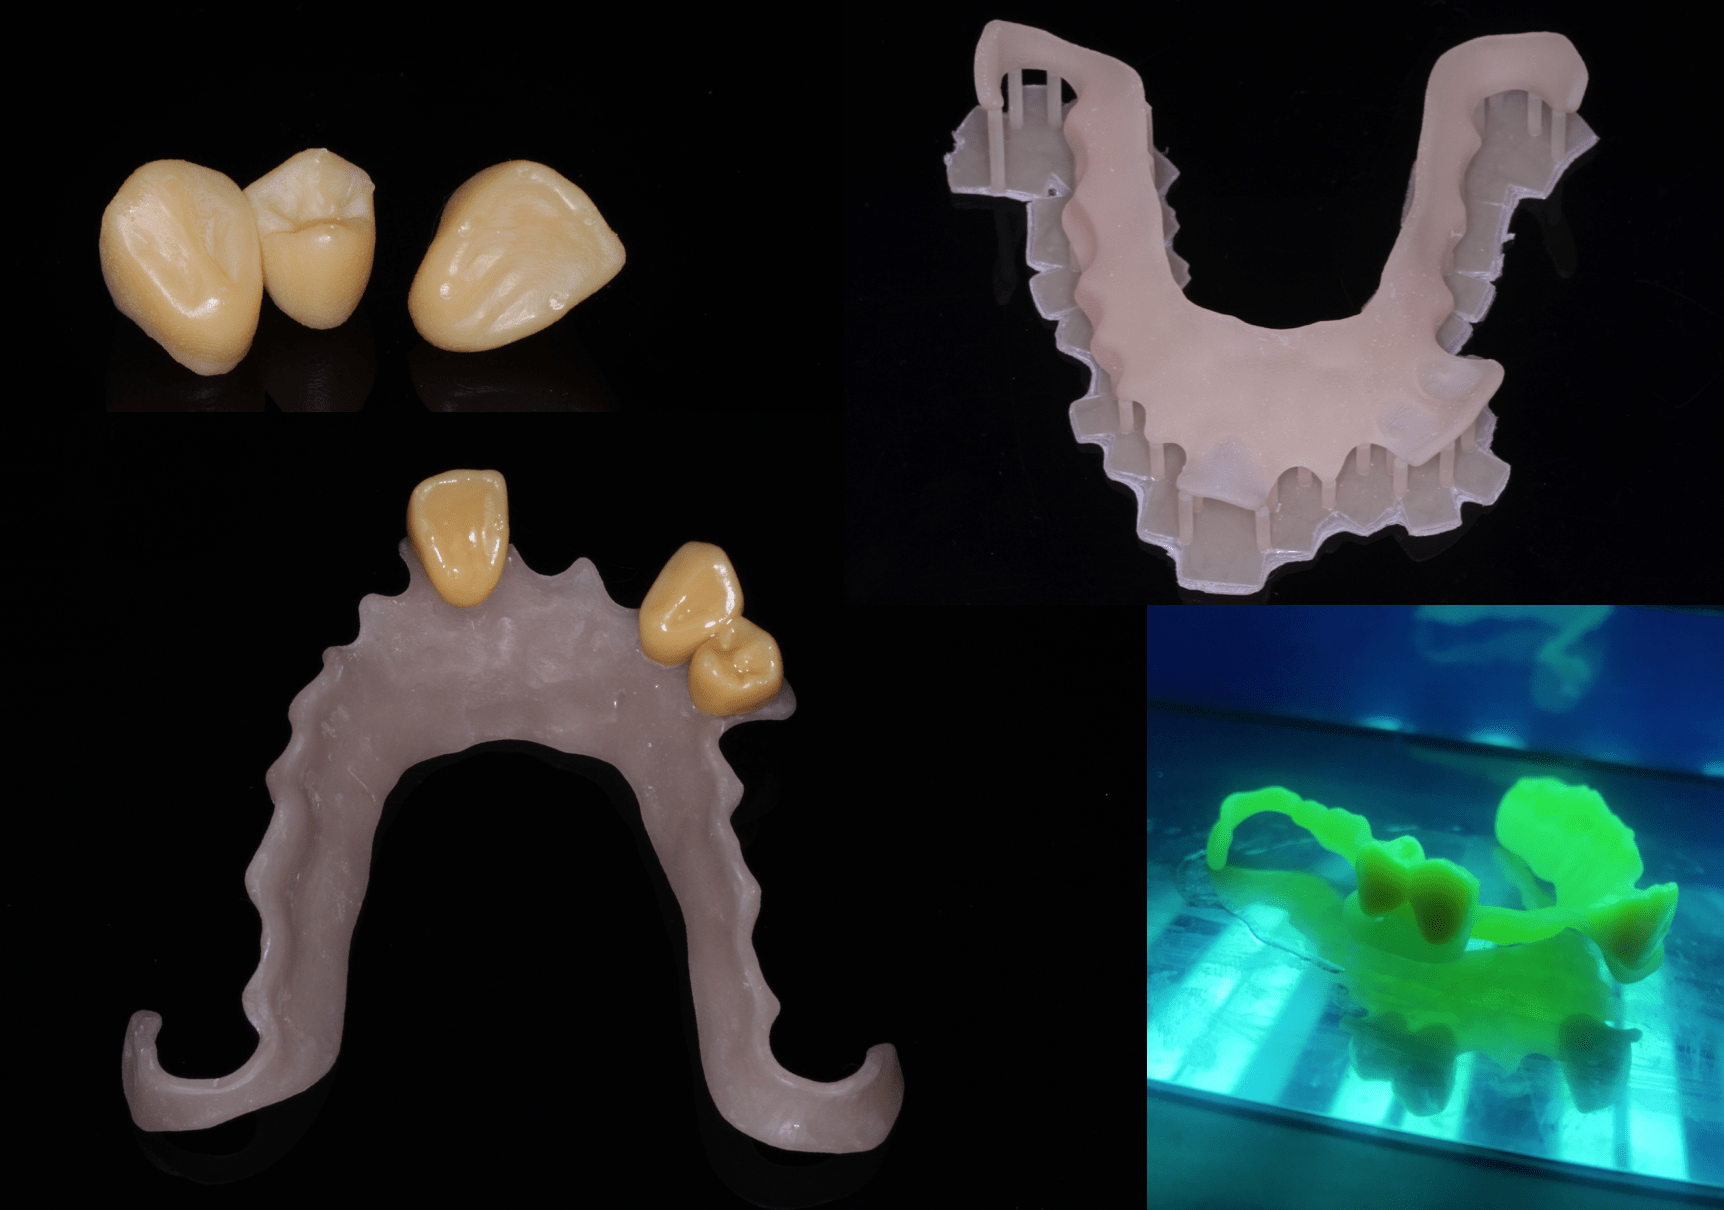
Remove the supports and polish. You can affix the teeth to the base with just brushing some of the NextDent Base resin onto the “sockets” and put everything in the cure box. I used NextDent Base and you should be using NextDent C and B resin. For this example I just used some Moonray Tan Model resin as the C and B is a hideous yellow color. Both models were printed in about an hour each on my Moonray S!!
If you want to learn more about 3D Printing come to a 3D Printing Party! Our next one is in Vegas on Jan 19/20. Although we won’t be playing with ExoCAD on this one, I will do an advanced course just on ExoCAD and 3D printing later in the year. But come to the one in Jan we will be covering the basics!
https://www.eventbrite.com/e/dental-3d-printing-party-las-vegas-tickets-39097474599