The Implant patients are coming out of the woodwork!! Here is a fun case, fully Guided post sinus lift by a specialist:

Replacing 2-4 too hard to get 3 CEREC proposals so I cheated and went with a Classic Guide bite plate with Barium Sulfate Teeth:

Post Sinus graft, I do like the soft tissue from CEREC, but planning with Barium sulfate teeth is just as easy.

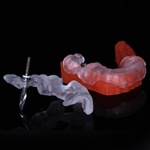
The Surgical Guide is a modification of the radiographic guide, as you can see the remains of the Barium Sulfate teeth. You always have to make sure that the Radiographic Guide fits in the same orientation of the Surgical Guide:

Tissue punches. This case was sent in before the new Large SICAT/Implant Direct Guide sleeves so I started the punch with a small punch then free handed #2 and #3 with a larger punch:

Again, the Implant Direct Guide Handle kit was originally invented to be visually depth controlled meaning you had to look out for the laser lines at 19 or 22mm. I’m not the sharpest tool in the shed, so I figured out that if you measured the length of the drill in the hand piece to the head minus 1.5mm for the handle. In Galileos this is the D2 value:

Go through the series, again they just used the small sleeves which allow for up to a 4.3mm implant but I have 5s planned on 2 and 3, so I free handed the drill in those sites, stopping 1.5mm short:

These are Implant Direct Re-plants. I had some extra Re-Plant Zirc Abutments I wanted to use up so I bought these instead of my Legacy 3. As you know, the Legacy 3 has an abutment/fixture mount that has an emergence profile that is too large for most Guide Sleeves. So we place the implant through the Guide but how do you know when to stop?

We know that the Fixture Mount is 12mm long and the Implants are 13mm long so that means the whole enchilada is 25mm. We set the D2 to 22mm so we want the fixture mount to stick out by 3mm. The notches at the top measure 1mm so we want three notches:

Here you can see that we have about 3 notches sticking out. Now the Indexing is weird on these so you need to take the Guide off and on to get it right. The Flat on the temp abutment is one tri lobe and the two corners on the back represent the back tri lobes. I don’t plan on using these implants other than just this case, so I went back and forth and got it.

This patient has really thick gingiva, but you can see nice spacing and parallelism:

Indexed. I usually like the big fat healing abutments, but she forgot her flipper and I did not want to risk her hitting them so I used the freebie healing caps and I will just punch the tissue again at uncovery. Nice to have that sinus lift up there to use 13mm implants. you can see the thick tissue on the radiograph:

Planned and placed. You can see how the pan distorts as you get to the posterior as her tissue is thick but not 10mm thick. Total time for 3 implants was about 45minutes


