A problem that some have been having is success using the CEREC guide. When beta testing, we had to do a case off a model. Also in my lectures and all over we state that you need to have 10 cases (not implants) under your belt with Optiguide or Classicguide before you attempt CEREC Guide. So here are two tricks that can hopefully help those who are having difficulty and a case that no noob should attempt until they have placed at least 30 posterior implants:

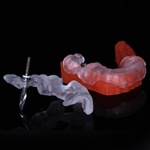
One thing thats important is cutting a window at the base of your guide for the drill to pass. Cut a large enough window that still as “stops” for the drill body. Flip the Guide over and look. If the Drill Body is flush with the thermoplast you are good to go. If there is space you need to remove anything that may be binding and preventing the Drill Body from seating. The “feel” should be like seating a crown that goes all the way down. You know that feeling, its just hard to describe.

Another thing that you should really do to all your cases is take an old drill and drill into the model first. With Mach 2 its soft takes 5 seconds. Place an angulation pin or the drill and take a look. If you are really worried, powder it up in CEREC and export it as an .ssi file into Galielos. Turn on the CEREC model and see if it coincides with your plan. If you look at the lower right the pin is in the same position as the drill path.

So here is a case not for the noobs! Patient comes in yesterday afternoon tooth fractured at the gum line.

Radiographic Guide made and located in software. Look at the difference between the CEREC model and the noise in the remaining PFMs, so valuable!

I usually like my pilot path to exit through the cingulum, but look at the extreme 45 degree angle that the bone makes. If someone tried to upright the implant the apex would be through the buccal plate. Not for the noobs but this is what I talk about in my lectures, you just cant see or evaluate this without having the cross sectional view.

Extracted the root as the Drill Body was milling. We have about 8mm of root in bone, so using a 13mm implant is on order here. 3.7 is my go to diameter for laterals with the Legacy 3:

D2 set to 25mm. As Emil states, the D2 is really irrelevant as the stop will hit the bone regardless. But to mill a guide we need this to be set, so I set it as the length of the drill in the Saechin hand piece. Since we are not using keys we do not have to subtract 1mm on the D2. Put some water in the Guide Sleeve as the stops fit really well. Also start out with a long stop regardless of length to start a purchase, then use any of the smaller stops that allow for 13mm of drill to do the rest.

Put your pilot in there and take a film (incidentally we just got the schick 33 sensors and had a glitch in the installation with our new server, I lost my pre-op and working length film, took a final). Normally I would not want that extreme angulation of the drill, but it matches the path of the bone and you will see in the final, I did not have to touch my stock abutment, so it worked out. But you can see that the drill path is exactly where the pilot ended up!

Go through the series, one cool thing about Emil’s stops is that you can go up to the 3.4mm drill in the small while still having metal guiding your drill. With the keys you can just go up to the 2.8

Implant placed, great torque values. Even with the angulation in the bone we are still in an acceptable position bucco-lingually:

Modified the stock abutment removing the green part, no other adjustments were needed. Grafted and placed a “doughnut” of membrane. Sutured with 2 week resorbable PFTE sutures. I shortened the temp. But you can see that buccally we have a large gap between the implant and the buccal plate and a nice cervical line on the temp. If the implant was too far buccal the temp would be “longer” gingivally.
Final Films


