Well, you can’t do it all! Here is a patient that had an implant done by a great specialist. As I don’t normally place Straumann, I was lucky to have compatible parts and pieces. I did not have a scan post, and the ti-base was on back order, so I opted for a traditional PVS impression. Note the very nice tissue and the supra crystal bone levels. This site was grafted by the OS with a non resorb able membrane which is making me want to take another look at them.
I have never taken an impression with a combo snappy-fixture level impression (closed tray) , which was pretty cool! Sent to the lab for a screw retained Emax crown.

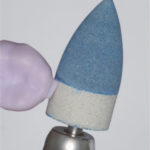
Due to the position of the implant we ran into some trouble with the ti base. Remember its OK to adjust the occlusal portion of the Ti-base, just not the axial and not so far that you harm the screw. Just design it so that it sticks out of the proposal. Jack my lab guy scores the top of the ti-base with multiple “slots” and then removes the purple emax until its flush.
In a perfect world I would have liked a more anatomically contoured healing abutment to start forming the tissue as it really bleached, another benefit of screw retained. In a cemented situation, if we did not make a crestal incision, the hydraulic forces may have lifted our crown.
After torqing the crown down to 30 Ncm we go through the protocol of filling the access. Make sure you use an isolite or dam as we start with Hydro-Fluroic acid, Silane, bonding agent, then sponge then composite.

Here is a little tip. Notice the access looks a bit gray. I have been going back and forth from Point 4 opaque which was used here and Flow-it ALC opaque. The Point 4 is not opaque enough. Use the flow it ALC, its like white out. Again, an OK result. I haven’t felt awesome about my finals lately, hopefully I’ll get a good one soon.


