So here is a case that sort of goes against some of the stuff I teach. In the posterior I like to have one implant per tooth. I detest any sort of cantilever, be it a pontic or a bulbous crown resulting from an off angle implant. I tolerate cantilevers in the anterior due to the forces of occlusion being lighter. In this case a patient broke off a cantilever double abutted bridge. Big central sized lateral. So in this case I decided to do two implants one per tooth and hope to get some inter dental papilla growth. Wish me luck! The patient came in without the bridge and we took a CEREC scan with and without the bridge to plan the case

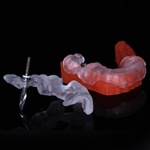
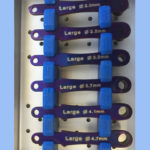
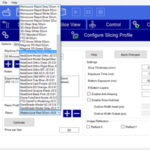
Planned for an optiguide using the Implant Direct Guide Handle Kit. You can see that we just made a little “crown” or only on each model and imported the two “yellow stone” models into Galileos and I can toggle between these just like a crown proposal. Two implants in the cingula of both #7 and #8. Make sure you display the guide sleeves to make sure that there is no overlap.

Removed the root fragment of #8 with my handy dandy periotomes and confirmed that the guide was seating with the window on the cusp of #6

Used my IME punch and went through the first drills. I still take working length films just like endo. It takes a minute or two and just gives me confidence.

Two Legacy 3 Implants from Implant Direct. I am using up my stock and will most likely switch to either the legacy 1 or 2 just because I do so much custom abutments. If you are into stock abutments you may want to look at the Legacy 4. The Interactive is a bit of a conundrum for me as I really want to get that deep conical connection and aggressive taper, but won’t use the abutment. I’ll still most likely switch to that one just for the implant body.

Any long term immediate temp in my office gets a Bio Temp or a CEREC Temp. In this case I just used the stock Legacy 3 abutments and took a PVS impression for a Biotemp. Could I have scanned in CEREC? Yes, but I would have had to sand blast the abutments and was in a bit of a rush.

Bio Temps. Lets see how the papillae grow. We know we want the platform of the implants to be no greater than 5mm from the base of the contacts. In this patient, she really did not have any papillae before so I will most likely just keep the contacts low and close up the dark triangles with porcelain. Way out of occlusion and excursives. Will wait 4 months and post the finals.
Here we are at post 4 months and things seem to be healing well. Two TSV Scan posts imaged in CEREC 4.3!! We did the case in Bio Copy and for some reason the models did not match up. No biggie as Sirona brought back something kinda old school! Manual stitching, just like the red cam days. Worked great and I was off to the design.
Note the lingual placement of the implants in the future crown Cingula. Since we used the old bridge to plan the case and the temp was more or less a copy of the old bridge the implants are in a good place for a screw retained final.
Milled out 3 Emax crowns and tried ion the Ti-bases. We had a lot of tissue in the way, so out came my Dekka laser, which I love! Its so fast and deliberate. I found that using a Diode just takes so long and the tissue is just so hard to get out of the way.
Started with the Screw Retained crown. Note that the crown on the natural tooth is not fully seated or cemented. Hydrofluoric Acid. I LOVE TEFLON TAPE!! I take back what I have been saying about endo sponges! Teflon tape is way easier! Opaque flowable and Opaque paste composite after silane and bond.
I think the final result is acceptable, but we still have some un even-ness in tooth size. Will we get papilla growth? Not sure, she has no papillae elsewhere. But (and not to make excuses) she does not have a high lip line and she loves how they look and the fact that she can floss. So overall we did a good service for the patient.


