Here is a case that really outlines the technique I use for immediate molar implants, but also shows a common problem when using the Omnicam to restore, ..shiny things! Here we have a non restorable molar with a silver point endo. Did not have time to do it guided so off I went.
You know the deal. Flatten out the tooth, drill into the furcation with a carbide 557 and then drill into the furcal bone with a 2.3mm pilot. The dentin of the roots keeps the pilot centered within the bone and to not deviate into the root sockets. The roots were then sectioned and removed leave the glide path in the furcal bone.
I played around with something different this time. We know that in the socket we don’t have a lot of bone. We also know that there are two ways to make a “hole” in osteotomy preparation. We can drill it out with subsequent twist drills or use a series of expanders after the pilot. By using expanders the bone just gets pushed up into the sinus or out into the neighboring root sockets rather than drilled out.
The ostoetomy was completed after the roots were removed. Really nice stability with these 7mm implants.
Allograft placed, membrane-on-a-helaing abutment like I always do to stabilize it. Gut sutures
About 6 months later we are ready to roll. Removed healing abutment, as you can see the tissue profile is a little lacking. In a perfect world we would want to replace the cylindrical healing abutment with an anatomic healing abutment. But we went for it any way and after the digital impression we placed a contour healer to start the shaping process which worked out well.
We initially wanted to do this all chairside and all intra orally, but that gold crown was giving me all sorts of grief so we ended up taking a fixture level impression and sent the patient home.
As you know, Ti-Bases are designed to be used outside the mouth without the gingival mask so that you can see the notch better. Also you can see better my tissue profile and the fact that it really does not look even remotely anatomic, so I just ignored it and hoped my contour healer would do its job.
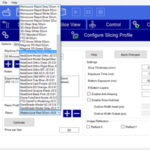
Make sure you select Ti-Base and not Scan Post, also you won’t get anywhere with intra oral mode outside of the mouth, so make sure you turn on Extra Oral model and turn it back to Intra Oral when you have another patient. Of course you will figure it out the hard way when you try to image in the mouth with extra oral mode. We decided to do screw retained.

Due to the placement it was cool going with screw retained so we designed it, you can see how much the ginigval tissue touches the restoration, but I still wanted to see what the contour healer could do.
Brought the patient back wearing the contour healer that was placed at the impression appointment and placed the Ti-Base just to try in the purple Emax abutment block.
Purple Block in the mouth! Tissue displaced well with the contour healer and restoration well adapted to the Ti-Base.
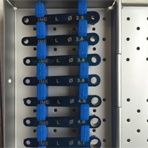
Prepared the Ti-Base with sand blasting. The images on the left are from the Ivoclar PDF, I just put scotch tape over the internal connection. I am exclusively just using the Implant Direct screw now over the Ti-Base screw.
After Stainig and Glazing, the Emax framework was luted with Multi LInk and tried in. Placed a sponge and torqued to 30 Ncm. Even the LT block has better translucency than most PFMs.
Final, Flow It ALC Opaque with opaque composite on top, a little ochre stain to keep it real. I really am going to switch to more screw retained after this!


