So today is an exciting day for me for two reasons! First I am up in Montreal getting ready to do my largest hands on course to some great CEREC and XG-3D users. Second, I finally get to start posting again! Ivoclar has released their Emax abutment block and I have been waiting for them to get that product out, so time to unleash the “Kraken”.
Here is a completed case , #9 Internal/External resorption. Non restorable. One drawback of doing a CEREC Guide case is that you need a separate scan, if you change your mind after the initial scan in diagnosis. This really shows the extent of what you can see with a CBCT.

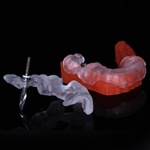
This is an initial prototype of the CEREC Guide keys you can buy in the store for Zimmer and Implant Direct. Removed tooth, then took a scan with the Reference Body. Always like to take a film with the pilot in place to check that I am on course.

Implant placed, note the gap distance on the buccal.

Stock Zirconia abutment prepped in the mouth. CEREC temp, purposely under contoured in all dimensions to allow tissue growth.

6 months of healing, took gingival mask and scan post image in CEREC 4.2

Planned the case using smile design. Split file with Emax abutment and Emax crown.

One great thing about Emax is that you can try it in and the shrinkage is minimal. With InCoris you have to sinter first before you can try it in. The abutment is not seated all the way on the ti-base due to the tissue, hence the long look.

Milled and designed in CEREC 4.2, but the lab did the cut back on a physical model. I am almost ready to go completely digital but for cutbacks, I would think having a model to be helpful.

Progression image, you can see already after cementing how the papillae are forming around the restoration. I think that this material will change everything when it comes to how we place and restore implants.


